
Optimizing game performance in Roblox Studio is of utmost importance when it comes to creating a successful and enjoyable gaming experience for players. Whether you’re developing a simple mini-game or a complex virtual world, optimizing performance can significantly enhance the overall gameplay and ensure that players have a smooth and immersive experience.
Here are several reasons why optimizing game performance in Roblox Studio is crucial:
- Player Satisfaction: Players expect games to run smoothly without any lag or frame rate drops. When a game performs poorly, it can frustrate players and hinder their overall enjoyment. By optimizing game performance, you can provide a seamless and responsive experience, allowing players to fully immerse themselves in your game world.
- Retention and Engagement: Performance issues can lead to a higher rate of player abandonment. If a game is too slow or suffers from frequent freezes, players are more likely to lose interest and move on to other games. Optimizing performance helps retain players and keeps them engaged, increasing the chances of them returning to your game for multiple play sessions.
- Increased Reach: Roblox is a popular platform with millions of active users. When you optimize your game’s performance, it becomes accessible to a wider audience. Players with lower-end devices or slower internet connections can still enjoy your game without facing significant performance issues. Optimized games have the potential to reach more players, increasing the visibility and popularity of your creation.
- Collaboration and Development: In Roblox Studio, multiple developers often work together to create a game. Optimizing performance allows for better collaboration, as it ensures that all team members can work smoothly and efficiently within the development environment. By reducing lag and improving the overall performance of the editor, developers can iterate more quickly and bring their ideas to life faster.
- Monetization Opportunities: Many Roblox developers earn revenue from their creations through in-game purchases, advertisements, or virtual currency systems. Optimizing performance can indirectly enhance your monetization potential. If players have a positive experience with your game, they are more likely to engage with its monetization features, such as making purchases or watching ads. Improved performance can lead to higher engagement and, subsequently, increased monetization opportunities.
Now that we understand the importance of optimizing game performance in Roblox Studio, let’s explore some key strategies you can implement to achieve optimal performance:
- Efficient Scripting: Write clean and efficient scripts to minimize resource usage and improve performance. Avoid unnecessary loops, excessive cloning, or redundant calculations. Optimize your code by using data structures effectively and reducing script complexity.
- Level of Detail (LOD): Implement LOD techniques to reduce the number of polygons or level of detail in distant or less important objects. This technique improves performance by rendering simpler versions of objects that are farther away from the player’s viewpoint.
- Culling and Occlusion: Implement culling and occlusion techniques to reduce rendering overhead. This involves hiding objects that are not currently visible to the player, optimizing rendering resources and improving overall frame rates.
- Asset Optimization: Optimize your assets, including models, textures, and audio files. Reduce unnecessary polygons, compress textures, and use appropriate compression formats to minimize file size and memory usage.
- Testing and Profiling: Regularly test and profile your game to identify performance bottlenecks. Use Roblox Studio’s built-in performance analysis tools to identify scripts, assets, or systems that may be causing performance issues. Once identified, optimize or refactor these elements to improve overall game performance.
Optimizing game performance in Roblox Studio is an ongoing process that requires attention to detail and continuous testing. By prioritizing performance optimization, you can create games that run smoothly, engage players, and stand out in the competitive Roblox marketplace.
Using the Performance tab to monitor and analyze game performance
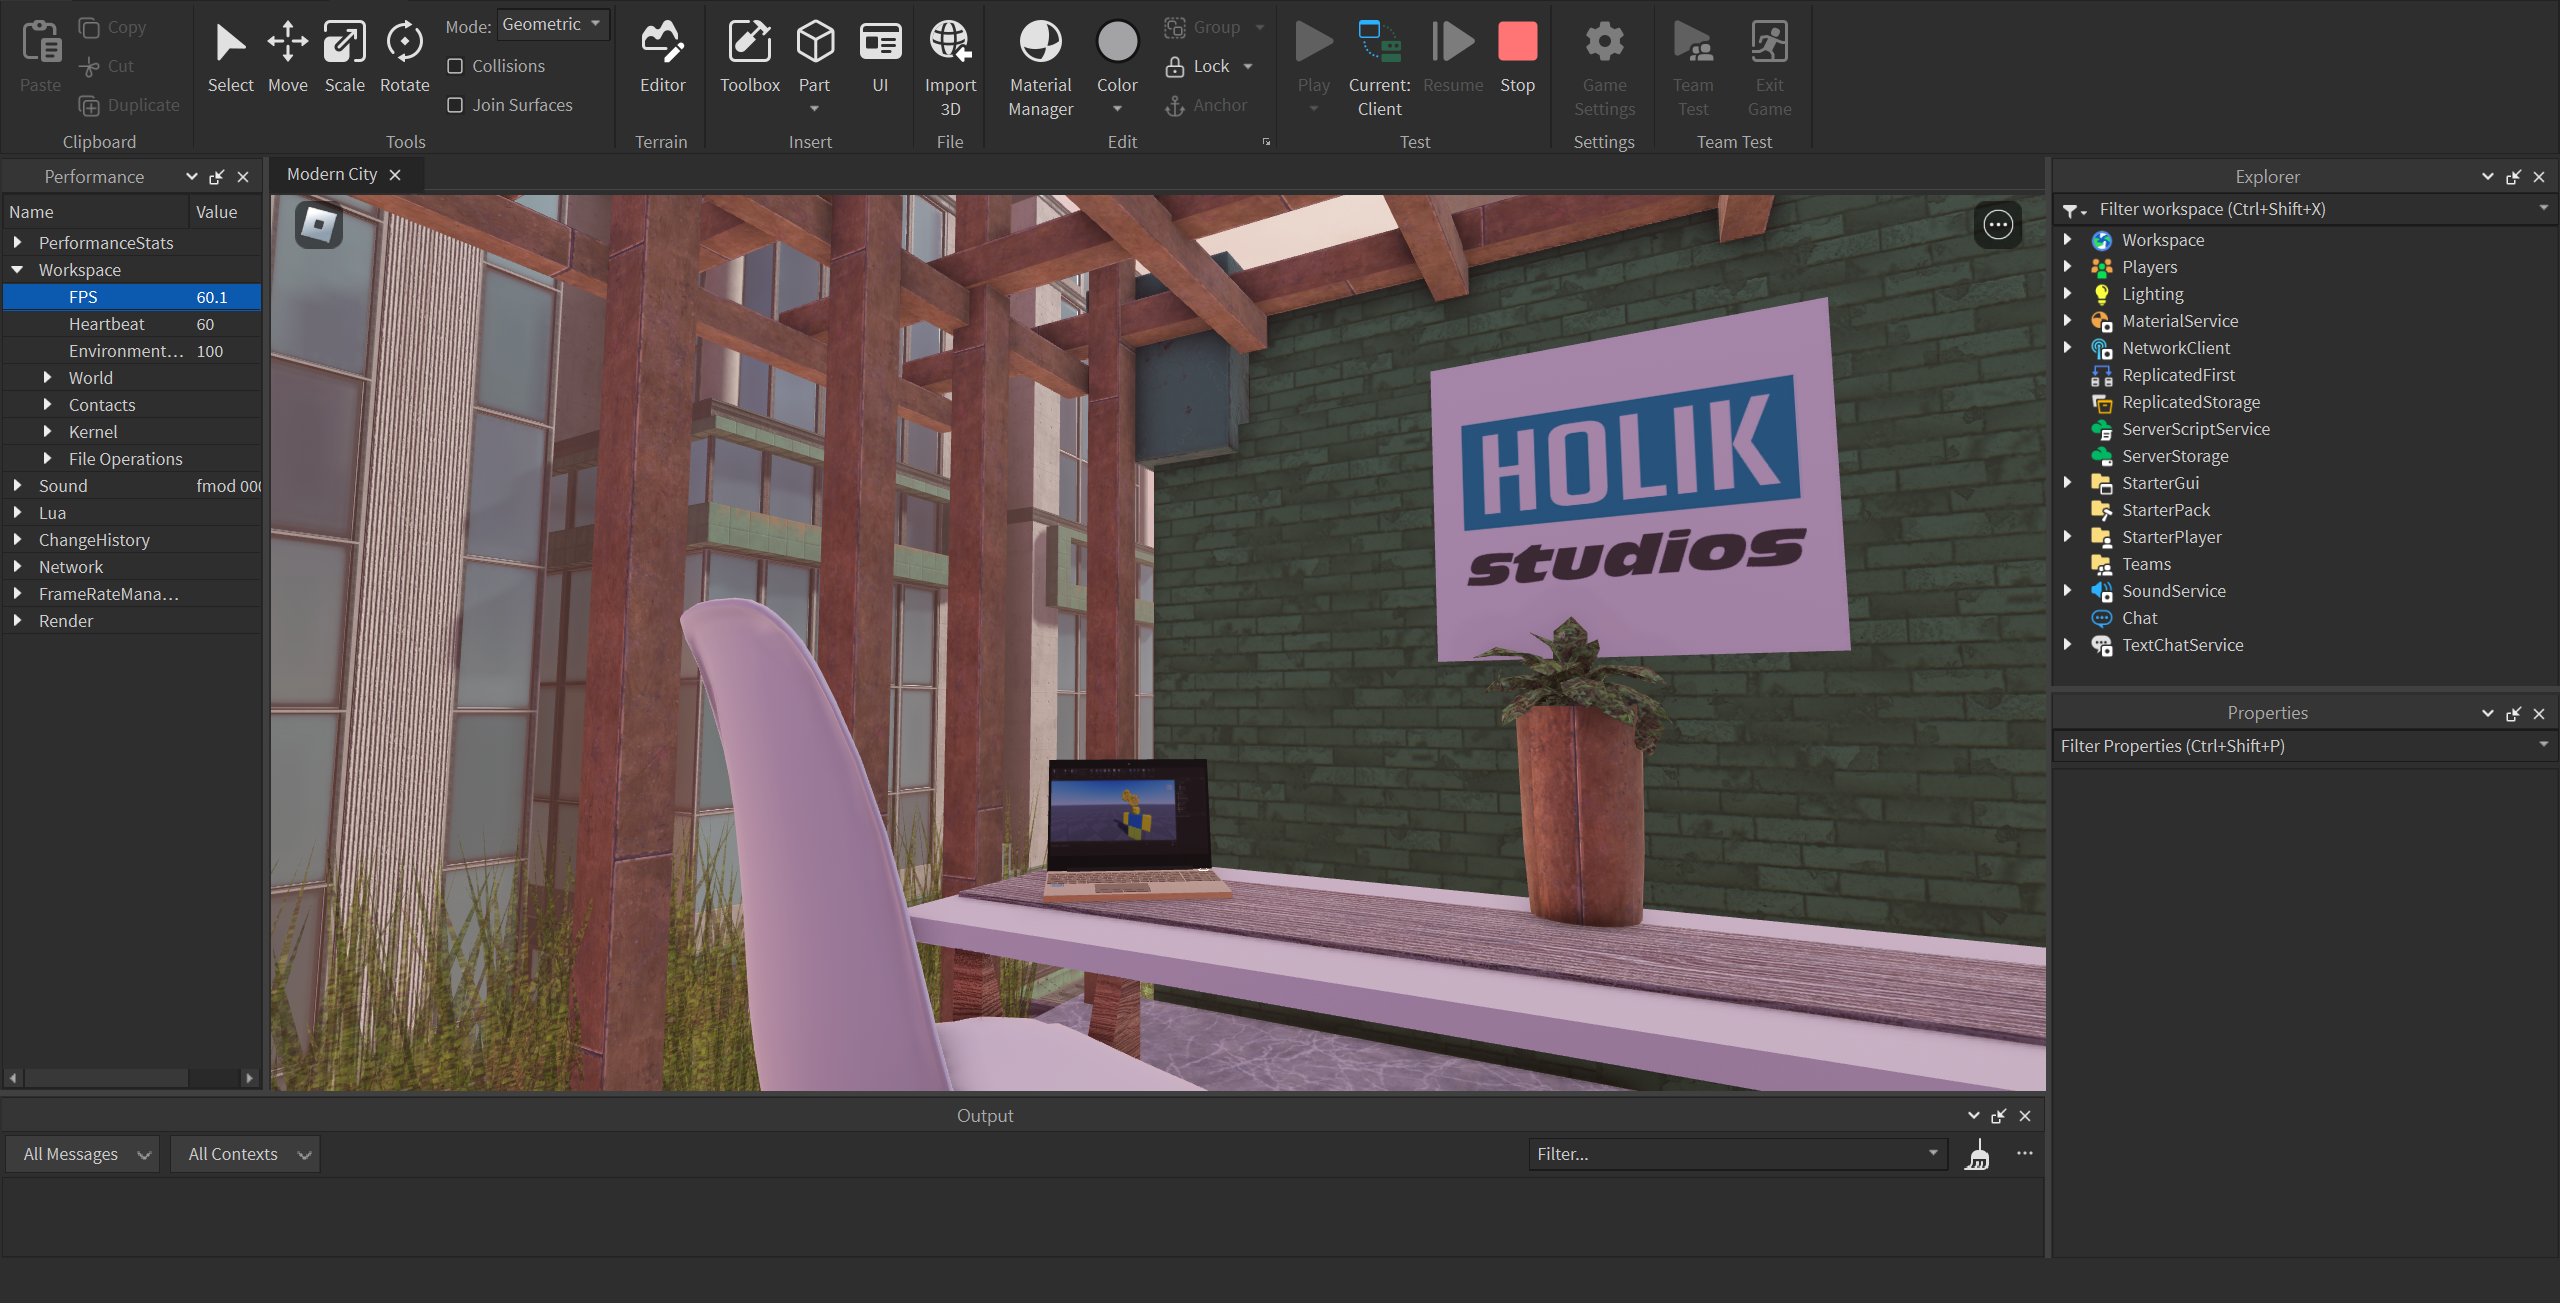
The Performance tab in Roblox Studio is a powerful tool that allows developers to monitor and analyze the performance of their games in real-time. It provides valuable insights into the various aspects of game performance, enabling developers to identify and address performance issues efficiently. By utilizing the Performance tab effectively, developers can optimize their games for smoother gameplay and enhanced player experiences. Here’s an overview of how to use the Performance tab in Roblox Studio:
- Opening the Performance tab: To access the Performance tab, open Roblox Studio and navigate to the “View” tab in the toolbar. Click on “Performance” to open the Performance tab window.
- Performance metrics: The Performance tab displays several key metrics that help you assess different aspects of your game’s performance. These metrics include FPS (frames per second), Ping (network latency), and Memory (memory usage). By monitoring these metrics, you can identify areas where your game may be experiencing performance issues.
- Recording performance: Click on the red “Record” button in the Performance tab to start recording the game’s performance. This allows you to capture performance data over a specific duration of gameplay. While recording, play your game and perform actions that are representative of typical gameplay scenarios.
- Analyzing performance data: Once you stop recording, the Performance tab will display a graph showing the recorded performance data. You can analyze this data to gain insights into various performance aspects. The graph may include FPS, Ping, and Memory usage over time. You can zoom in or out to focus on specific time intervals for more detailed analysis.
- Identifying performance bottlenecks: The Performance tab helps you identify performance bottlenecks by highlighting areas where your game may be struggling. For example, if you notice a significant drop in FPS during specific gameplay moments, it could indicate performance issues related to scripting or rendering. By identifying these bottlenecks, you can prioritize optimizations and make targeted improvements to enhance performance.
- Debugging and optimization: The Performance tab provides detailed information about the performance of individual scripts and assets. By expanding the “Scripts” and “Instances” sections in the Performance tab, you can see how much time each script or asset takes to run or load. This information allows you to identify specific scripts or assets that may be causing performance issues and optimize them accordingly.
- Iterative optimization: As you make optimizations to your game, you can use the Performance tab to measure the impact of those changes. By comparing performance data before and after optimizations, you can assess the effectiveness of your improvements and continue refining your game’s performance.
- Network analysis: The Performance tab also helps you analyze network-related performance. You can examine the Ping metric to identify network latency issues that may affect player experiences, especially in multiplayer games. If you notice high Ping values, it may indicate a need to optimize network communication or consider server-side improvements.
By utilizing the Performance tab in Roblox Studio, developers can gain valuable insights into their game’s performance and make informed optimization decisions. Regularly monitoring and analyzing performance data allows for iterative improvements, resulting in smoother gameplay, increased player satisfaction, and a more successful gaming experience overall.
Using script performance tab to identify performance issues
The Script Performance tab in Roblox Studio is a powerful tool that allows developers to analyze and identify performance issues related to scripts in their games. It provides detailed information about script execution times, memory usage, and other valuable metrics. By utilizing the Script Performance tab effectively, developers can pinpoint performance bottlenecks, optimize their scripts, and improve overall game performance. Here’s a guide on how to use the Script Performance tab to identify and address performance issues in Roblox Studio:
- Opening the Script Performance tab: To access the Script Performance tab, open Roblox Studio and navigate to the “View” tab in the toolbar. Click on “Script Performance” to open the Script Performance tab window.
- Enabling script profiling: Before you can analyze script performance, you need to enable script profiling. To do this, click on the “Enable” button in the Script Performance tab. This will start profiling the scripts in your game and gathering performance data.
- Profiling script execution times: The Script Performance tab displays a list of all the scripts in your game, along with their execution times. It shows the total time each script takes to execute, as well as the percentage of the total script time it occupies. Scripts that take a significant portion of the total script time may indicate potential performance issues.
- Sorting and filtering scripts: You can sort the scripts in the Script Performance tab based on execution time or percentage of script time. This allows you to quickly identify scripts that are consuming the most resources. Additionally, you can use the search bar to filter scripts by name, making it easier to find specific scripts you want to analyze.
- Analyzing script performance data: Clicking on a script in the Script Performance tab reveals more detailed information about its execution. It displays the time taken by each function within the script, allowing you to identify which specific functions are causing performance issues. By analyzing this data, you can focus on optimizing the most resource-intensive functions.
- Memory usage analysis: In addition to execution times, the Script Performance tab also provides information about the memory usage of scripts. It shows the total amount of memory used by each script and can help you identify memory-intensive scripts that may contribute to performance issues. By optimizing memory usage within these scripts, you can reduce the overall memory footprint of your game.
- Optimizing script performance: Once you have identified scripts or functions that are causing performance issues, you can start optimizing them. There are several approaches you can take, such as reducing unnecessary calculations, optimizing loops, using more efficient algorithms, or refactoring code to improve performance. The Script Performance tab helps you measure the impact of these optimizations by monitoring execution times before and after the changes.
- Iterative optimization: Optimizing script performance is an iterative process. After making initial optimizations, continue monitoring the Script Performance tab to evaluate the impact of your changes. You can identify additional areas for improvement and make further optimizations to enhance game performance.
By utilizing the Script Performance tab in Roblox Studio, developers can effectively identify and address performance issues related to scripts in their games. Monitoring execution times, analyzing memory usage, and optimizing scripts can lead to significant improvements in game performance and provide players with a smoother and more enjoyable gaming experience.
Leveraging Roblox Studio’s asset optimization features
Roblox Studio offers a range of asset optimization features that allow developers to enhance game performance by reducing file sizes, optimizing textures, and improving overall rendering efficiency. Leveraging these asset optimization features is crucial for creating games that load quickly, consume fewer resources, and provide a smoother experience for players. Here are some key asset optimization features in Roblox Studio and how to make the most of them:
- Mesh Optimization: When using complex 3D models in your game, you can optimize them by reducing the number of polygons or simplifying their geometry. Roblox Studio provides tools like the “Decimate” feature, which allows you to reduce polygon count while preserving the overall shape and appearance of the model. By optimizing meshes, you can significantly reduce the file size of your models, leading to faster loading times and improved rendering performance.
- Texture Compression: Textures can consume a substantial amount of memory and impact game performance. Roblox Studio offers various texture compression options, such as DXT and BC7, which reduce file sizes without compromising visual quality. Experiment with different compression settings to find the right balance between file size and visual fidelity. Additionally, consider using texture atlases or sprite sheets to combine multiple textures into a single image, minimizing the number of texture fetches and improving rendering efficiency.
- LOD (Level of Detail) Implementation: Level of Detail is a technique that adjusts the level of detail or complexity of an object based on its distance from the player’s viewpoint. Roblox Studio provides LOD support, allowing you to create simpler versions of objects for distant or less important areas. By implementing LOD, you can reduce the number of polygons and optimize rendering performance, especially for large or complex game environments.
- Audio Compression: Audio files can also contribute to the overall file size and memory usage of your game. Roblox Studio offers audio compression options like OGG Vorbis, which can significantly reduce file sizes while maintaining audio quality. Compressing audio files helps reduce loading times and memory consumption, especially for games with extensive audio content.
- Animation Optimization: If your game involves animated characters or objects, optimizing animations can contribute to improved performance. Roblox Studio allows you to create animation sequences with fewer keyframes or use animation compression techniques like keyframe reduction. This reduces the memory footprint of animations and improves the efficiency of playback.
- Asset Bundling: Roblox Studio’s asset bundling feature enables you to group multiple assets into a single package, reducing the number of individual files that need to be loaded. Bundling assets together can enhance loading times and improve overall performance, especially for larger games with numerous assets.
- Profiling and Testing: Once you’ve optimized your assets, it’s important to profile and test your game’s performance using Roblox Studio’s built-in tools. Monitor metrics like loading times, memory usage, and frame rates to ensure that your asset optimizations have effectively improved performance. If necessary, iterate on your optimization efforts to fine-tune and further enhance game performance.
By leveraging Roblox Studio’s asset optimization features, developers can significantly improve the performance of their games. Reduced file sizes, optimized textures, LOD implementation, audio compression, and animation optimization all contribute to faster loading times, smoother gameplay, and better overall player experiences. By consistently optimizing assets and utilizing the available tools, you can create games that perform optimally across various devices and provide players with an immersive and enjoyable gaming experience.
Employing LOD (Level of Detail) models for distant objects
Employing Level of Detail (LOD) models for distant objects is a crucial technique in optimizing game performance in Roblox Studio. LOD allows developers to display simplified versions of objects when they are far away from the player’s viewpoint, reducing the number of polygons rendered and improving rendering efficiency. By implementing LOD models, developers can enhance game performance, reduce memory usage, and create more immersive gameplay experiences. Here’s a guide on how to employ LOD models for distant objects in Roblox Studio:
- Identifying LOD Candidates: Start by identifying objects in your game that would benefit from LOD implementation. These are typically objects that are complex or have a high polygon count but are not prominently visible to the player from a distance. Examples include distant buildings, foliage, or large environmental props.
- Creating LOD Models: For each object identified as an LOD candidate, create simplified versions with fewer polygons. The simplified versions should retain the overall shape and appearance of the original object but with reduced detail. Use modeling software or Roblox Studio’s built-in modeling tools to create the LOD models. Aim to strike a balance between polygon reduction and maintaining visual fidelity.
- Importing LOD Models: Once you’ve created the LOD models, import them into Roblox Studio. Each LOD model should be a separate asset with its own MeshPart or UnionOperation object. Assign appropriate materials and textures to ensure consistency with the original object.
- Determining Distance Ranges: Decide on the distance ranges at which the LOD models should be displayed instead of the original high-detail objects. Consider factors such as the size of the object and the desired level of visual quality at different distances. Smaller objects may require LOD transitions at shorter distances compared to larger objects.
- Setting Up LOD Transitions: In Roblox Studio, place the high-detail object and its corresponding LOD models at the same position in the game world. Add a script to the high-detail object that calculates the distance between the object and the player’s camera. Use this distance information to determine when to switch to the appropriate LOD model based on the predetermined distance ranges.
- Triggering LOD Model Switching: When the high-detail object enters a specific distance range, use the script to activate the corresponding LOD model and deactivate the high-detail object. This switch should be seamless and imperceptible to the player. You can achieve this by enabling or disabling the visibility of the objects using the “Visible” property or by manipulating the transparency of the objects.
- Testing and Refining: Test your LOD implementation in different scenarios and adjust the distance ranges and LOD models as needed. Monitor the game’s performance, frame rate, and visual quality to ensure a smooth transition between LOD models and high-detail objects. Make adjustments to the LOD models or distance ranges if visual artifacts or performance issues arise.
- Iterative Optimization: As you optimize your game further, revisit the LOD implementation and refine it based on player feedback and performance analysis. Continuously monitor and adjust LOD distances and models to ensure optimal performance and visual quality.
By employing LOD models for distant objects in Roblox Studio, developers can significantly improve game performance without sacrificing visual quality. The use of simplified models for objects that are far away from the player’s viewpoint reduces rendering complexity and improves overall gameplay experiences. With careful implementation and testing, LOD models contribute to faster rendering times, reduced memory usage, and a more immersive and optimized game for players to enjoy.
Adjusting physics properties and simulation settings
Adjusting physics properties and simulation settings in Roblox Studio is essential for creating realistic and interactive gameplay experiences. By fine-tuning these settings, developers can control how objects interact with each other, simulate physics-based movements, and optimize performance. Here’s a guide on how to adjust physics properties and simulation settings in Roblox Studio:
- Accessing Physics Settings: In Roblox Studio, navigate to the “Model” tab in the toolbar and click on “Physics” to access the physics settings. This opens the “Physics” window, where you can modify various physics properties and simulation settings.
- Adjusting Collision Settings: Collision settings determine how objects interact with each other in the game. In the Physics window, you can modify properties such as “CanCollide,” “CollisionGroup,” and “CollisionGroupId.” “CanCollide” determines whether an object can collide with other objects. By enabling or disabling this property, you can control the interaction between objects. “CollisionGroup” and “CollisionGroupId” allow you to group objects together and define specific collision behavior between those groups.
- Setting Mass and Density: Mass and density properties determine the weight and physical behavior of objects. By adjusting these properties, you can control how objects respond to forces like gravity and collisions. Higher mass values result in objects that are heavier and require more force to move, while density affects how objects interact with fluids (if enabled in the game). Experiment with different mass and density values to achieve the desired gameplay effects.
- Configuring Friction and Bounciness: Friction and bounciness properties influence how objects slide against surfaces and how they bounce off each other. By modifying these properties, you can control the realism and responsiveness of object movements. Higher friction values result in objects that slide less, while higher bounciness values make objects bounce more. Adjust these properties to achieve the desired level of realism or exaggerated physics effects.
- Tweaking Joint Constraints: If your game involves objects connected by joints, you can adjust joint constraints to control the range of motion and behavior of those joints. In the “Physics” window, you can modify properties such as “LowerAngleLimit,” “UpperAngleLimit,” “LowerTorqueLimit,” and “UpperTorqueLimit” to limit rotation angles and torque values for joints. These settings allow you to create specific movement behaviors for connected objects, such as hinges or springs.
- Enabling Simulated Physics: Roblox Studio provides the option to enable or disable simulated physics on specific parts or models. By enabling simulated physics, objects will respond to forces and collisions based on the physics properties you have set. If you disable simulated physics, objects become static and will not move or interact with the environment. Use this feature to control which objects require physics calculations and optimize performance.
- Testing and Iterating: After adjusting physics properties and simulation settings, it’s crucial to thoroughly test your game and observe how objects interact and behave. Pay attention to collision interactions, object movements, and the overall gameplay experience. Make necessary adjustments based on the desired outcome and player feedback to ensure a polished and realistic physics simulation.
Remember to strike a balance between realism and performance optimization. Excessive physics calculations or complex joint constraints can impact game performance, especially in large-scale environments or with numerous interacting objects. Regularly test and optimize your physics settings to achieve the desired gameplay experience while maintaining smooth performance.
By adjusting physics properties and simulation settings in Roblox Studio, developers can create dynamic and immersive games with realistic object interactions and movements. Fine-tuning these settings allows for greater control over gameplay mechanics, encourages player engagement, and contributes to a more enjoyable gaming experience overall.
Best plugins for optimization in Roblox Studio
Optimizing your game in Roblox Studio is crucial for delivering a smooth and high-performing experience to players. Fortunately, there are several plugins available that can assist you in optimizing various aspects of your game. These plugins offer additional tools and functionalities to help streamline your optimization workflow. Here are some of the best plugins for optimization in Roblox Studio:
- Performance Stats by Roblox: This official Roblox plugin provides real-time performance statistics within the Studio environment. It displays valuable metrics such as frame rate, memory usage, and rendering time. By monitoring these statistics, you can identify performance issues and make informed optimizations. The Performance Stats plugin is a great starting point for understanding and improving your game’s performance.
- Materializer by Mullets: Materializer simplifies the process of applying optimized materials to your models. It automatically generates optimized textures and materials for your objects, reducing the file size and improving rendering efficiency. With Materializer, you can quickly optimize textures and enhance performance without compromising visual quality.
- PolyReduction by lukasmaximus: PolyReduction is a powerful plugin that allows you to reduce the polygon count of your 3D models. By simplifying the geometry, you can significantly reduce the file size of your models, leading to faster loading times and improved rendering performance. PolyReduction provides customizable settings, allowing you to balance polygon reduction and visual fidelity.
- DecalEditor by Mullets: DecalEditor simplifies the process of creating optimized decals for your game. It provides tools to adjust the resolution, compression, and format of your decals, helping to reduce file sizes and improve rendering performance. With DecalEditor, you can efficiently optimize and manage your decals without compromising their visual quality.
- MeshPartEditor by Mullets: MeshPartEditor is a plugin that allows you to optimize MeshParts in your game. It provides tools to merge multiple MeshParts into a single optimized MeshPart, reducing the number of individual objects in your game and improving rendering performance. With MeshPartEditor, you can optimize complex MeshPart structures and enhance performance.
- DTS Auto Optimize by nasTaj: DTS Auto Optimize is a plugin specifically designed for optimizing terrain in Roblox. It analyzes and optimizes terrain meshes, reducing polygon count and improving rendering performance. With DTS Auto Optimize, you can streamline the process of optimizing terrain in your game and achieve better performance in large-scale environments.
- LOD Generator by asimo3089: LOD Generator is a handy plugin that automatically generates Level of Detail (LOD) models for your objects. It analyzes the complexity of your models and generates simplified versions for use at different distances. LOD Generator helps optimize rendering performance by displaying lower-detail models for distant objects, reducing the number of polygons rendered.
- Roblox Optimizer by suzannehendrix: Roblox Optimizer is a comprehensive plugin that provides various optimization tools. It offers features such as batch optimization, where you can optimize multiple objects simultaneously, and model compression, which reduces file sizes. Roblox Optimizer also includes tools for optimizing scripts, textures, and decals, helping you streamline the optimization process.
These plugins can greatly assist you in optimizing different aspects of your game, including performance, file sizes, rendering efficiency, and more. Remember to review each plugin’s documentation and instructions to fully utilize their functionalities and ensure compatibility with your version of Roblox Studio. With the help of these plugins, you can efficiently optimize your game and deliver an optimized and immersive experience for your players.
Importance of iterative testing and benchmarking in performance optimization
Iterative testing and benchmarking are crucial components of performance optimization in Roblox Studio. They play a vital role in identifying bottlenecks, measuring improvements, and ensuring that your game performs optimally. By incorporating iterative testing and benchmarking into your development process, you can identify performance issues early on, make data-driven optimizations, and provide a smoother and more enjoyable experience for players. Here’s why iterative testing and benchmarking are important in performance optimization:
- Identifying Performance Bottlenecks: Through iterative testing, you can identify specific areas of your game that contribute to poor performance. By monitoring metrics such as frame rate, loading times, and memory usage, you can pinpoint scripts, assets, or game mechanics that negatively impact performance. This information allows you to focus your optimization efforts on the most critical areas, improving performance where it matters the most.
- Measuring Performance Improvements: Iterative testing and benchmarking help you measure the impact of your optimization efforts. By establishing baseline performance metrics at the start of development and regularly benchmarking against those metrics, you can track the progress of your optimizations. This enables you to evaluate the effectiveness of each optimization technique and make informed decisions about further optimizations.
- Prioritizing Optimization Efforts: As you iterate and test your game, you may discover that certain optimizations provide more significant performance improvements than others. By benchmarking different optimization techniques, you can prioritize your efforts and focus on the optimizations that yield the most noticeable benefits. This allows you to allocate your time and resources effectively, maximizing performance gains in critical areas of your game.
- Ensuring Consistent Performance: Iterative testing and benchmarking help ensure consistent performance across various devices and player scenarios. Different devices, network conditions, and player activities can affect game performance. By testing and benchmarking on a range of devices and under different conditions, you can identify and address performance issues that may arise in specific scenarios. This allows you to deliver a consistent and smooth gameplay experience to all players.
- Optimizing User Experience: Performance optimization directly impacts the user experience of your game. By regularly testing and benchmarking, you can identify and eliminate lag, long loading times, and other performance-related issues that can frustrate players. By delivering a well-optimized game, you enhance player satisfaction, increase engagement, and encourage them to spend more time in your game.
- Iterative Improvement: Game development is an iterative process, and performance optimization is no exception. Through repeated testing and benchmarking, you can continually refine and improve the performance of your game. As you make changes and introduce new features, it’s important to assess their impact on performance and make any necessary optimizations. Iterative testing and benchmarking allow you to address performance issues at each stage of development, resulting in a more polished and optimized final product.
In summary, iterative testing and benchmarking are essential for performance optimization in Roblox Studio. They enable you to identify performance bottlenecks, measure the effectiveness of optimizations, prioritize efforts, ensure consistent performance, optimize the user experience, and achieve iterative improvement. By incorporating these practices into your development process, you can deliver a high-performing game that provides a smooth and enjoyable experience for players.
Conclusion
Optimizing game performance in Roblox Studio is a critical aspect of game development that directly impacts the player experience. By employing various techniques and tools available in Roblox Studio, developers can enhance the performance of their games, resulting in smoother gameplay, faster loading times, and improved overall player satisfaction.
The importance of optimizing game performance in Roblox Studio cannot be overstated. A well-optimized game runs more efficiently, allowing players to enjoy uninterrupted gameplay without experiencing lag or frame rate drops. It also ensures that the game can run smoothly on a variety of devices, accommodating players with different hardware capabilities.
Roblox Studio provides several features and functionalities that enable developers to optimize their games effectively. The Performance tab allows for monitoring and analyzing performance metrics, identifying areas that require improvement. The Statistics tab provides detailed information about the game’s performance, enabling developers to pinpoint specific performance issues. The Script Performance tab allows for fine-tuning scripts to reduce unnecessary calculations and improve efficiency. Additionally, leveraging asset optimization features, such as LOD models and texture compression, helps reduce file sizes and enhance rendering efficiency.
Iterative testing and benchmarking are vital in the optimization process. By regularly testing the game’s performance and benchmarking against established metrics, developers can track improvements and identify areas that require further optimization. This iterative approach allows for continuous refinement and enhancement of the game’s performance throughout the development cycle.
Optimizing game performance in Roblox Studio not only improves the player experience but also allows for scalability and adaptability. Well-optimized games have a better chance of attracting and retaining players, contributing to the game’s success and longevity. Furthermore, optimization enables games to reach a wider audience by running smoothly on a variety of devices, including lower-end hardware.
Optimizing game performance in Roblox Studio is a vital aspect of game development. By leveraging the tools and features available, developers can create games that provide a smooth and immersive experience for players. Through iterative testing, benchmarking, and utilizing optimization techniques, developers can enhance performance, improve player satisfaction, and ensure the longevity and success of their games in the Roblox platform.