
Below is a step-by-step task in Roblox Studio to create a script that changes the color of a part when it is clicked by the player. The script will use a ClickDetector to detect when the part is clicked, and then it will change the color of the part:
- Open Roblox Studio:
- Launch Roblox Studio on your computer.
- Create or Open a Place:
- Create a new place or open an existing one where you want to add the script.
- Insert a Part:
- In the Home tab, click on the “Part” button to insert a new part into the workspace.
- Insert a ClickDetector:
- In the Explorer window, find the part you inserted, right-click on it, and select “Insert Object.”
- Choose “ClickDetector” from the menu.
- Insert a Script:
- Right-click on the part again, select “Insert Object,” and choose “Script” this time.
- Edit the Script:
- Double-click on the newly created script to open the code editor.
- Write the Script:
- Write the following Lua code in the script:
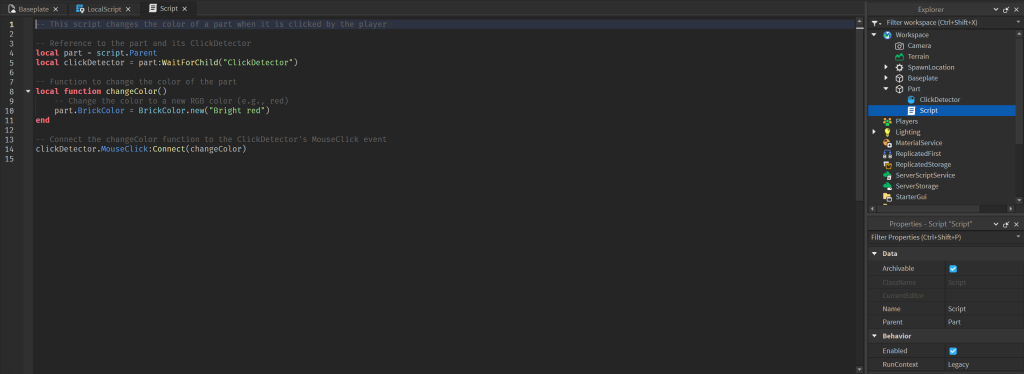
-- This script changes the color of a part when it is clicked by the player

-- Reference to the part and its ClickDetector
local part = script.Parent
local clickDetector = part:WaitForChild("ClickDetector")

-- Function to change the color of the part
local function changeColor()
-- Change the color to a new RGB color (e.g., red)
part.BrickColor = BrickColor.new("Bright red")
end

-- Connect the changeColor function to the ClickDetector's MouseClick event
clickDetector.MouseClick:Connect(changeColor)
Save the Script:
- Run the Game:
- Click on the “Play” button in the Roblox Studio toolbar to run your game.
- Test the Script:
- Click on the part in the game while it’s running.
- The part’s color should change to the specified color (in this case, bright red).
- Check the Output Window:
- Look at the Output window to check for any errors or messages related to the script.
Comments have been added to the script to explain the purpose of each section:
-- This script changes the color of a part when it is clicked by the player

-- Reference to the part and its ClickDetector
local part = script.Parent
local clickDetector = part:WaitForChild("ClickDetector")

-- Function to change the color of the part
local function changeColor()
    -- Change the color to a new RGB color (e.g., red)
    part.BrickColor = BrickColor.new("Bright red")
end

-- Connect the changeColor function to the ClickDetector's MouseClick event
clickDetector.MouseClick:Connect(changeColor)
This script utilizes the ClickDetector component to detect mouse clicks on the part and responds by changing the color of the part. The comments provide clarity on the purpose of each section of the script.
Conclusion
Task involved creating a script in Roblox Studio that changes the color of a part when it is clicked by the player. The step-by-step guide covered the insertion of a part, a ClickDetector, and a script into the workspace. The script utilized the ClickDetector to detect mouse clicks on the part and trigger a function that changes the part’s color.
The provided Lua script demonstrated the use of local variables to reference the part and ClickDetector, a function to change the color of the part, and the connection of this function to the ClickDetector’s MouseClick event. The chosen color change in the example was to “Bright red.”
This task serves as a foundational example for beginners in Roblox scripting, introducing concepts such as event handling and interaction between different components within the game. As users become more proficient with scripting in Roblox Studio, they can extend and modify this script to implement more complex interactions and game mechanics in their projects.