
Slicing software plays a crucial role in the 3D printing process by converting a 3D model into a format that the 3D printer can understand and execute layer by layer. This conversion is necessary because 3D printers build objects layer by layer, and the slicing software breaks down the 3D model into these individual layers, determining the toolpath and other parameters required for the printer to produce an accurate and high-quality print.
Here’s a detailed explanation of slicing software in 3D printing:
1. Importing 3D Models:
Slicing software begins its process by importing 3D models in commonly used file formats such as STL (Standard Tessellation Language) or OBJ (Object). These models can be created using various CAD (Computer-Aided Design) software or downloaded from online repositories.
2. Layer Division:
Once the 3D model is imported, the slicing software divides it into numerous horizontal layers, essentially creating a virtual stack of two-dimensional slices. The thickness of each layer is determined by the layer height setting, and this parameter influences the printing resolution and the overall quality of the print.
3. G-Code Generation:
The slicing software generates G-code, a set of instructions that guide the 3D printer on how to build each layer of the object. G-code includes information about the printer settings, temperature, print speed, layer height, infill density, support structures, and more. This code is essentially a roadmap for the 3D printer to follow during the printing process.
4. Support Structures and Rafts:
Slicing software also provides options for generating support structures and rafts. Support structures are temporary structures added to the model to prevent overhangs and ensure the print’s stability. Rafts are additional layers added to the bottom of the print to improve adhesion to the print bed.
5. Print Settings:
Users can customize various print settings within the slicing software, such as print speed, layer adhesion, infill density, and temperature. These settings impact the overall print quality, strength, and appearance of the final object.
6. Preview and Simulation:
Most slicing software includes a preview feature that allows users to visualize the print layer by layer. Some advanced software even provides simulation tools to predict potential issues like collisions or print failures before initiating the printing process.
7. Exporting G-code:
Once the slicing process is complete and the user is satisfied with the settings, the slicing software exports the G-code file. This file is then transferred to the 3D printer via a USB drive, SD card, or direct connection, allowing the printer to execute the instructions and build the physical object layer by layer.
Slicing software is a vital intermediary in the 3D printing workflow, translating intricate 3D models into a series of instructions that enable the printer to produce accurate and detailed physical objects. The flexibility and user-friendly interfaces of modern slicing software have contributed significantly to the widespread adoption and success of 3D printing technology.
Preparing Models for Slicing
Preparing 3D models for slicing is a crucial step in the 3D printing process, ensuring that the printed object accurately reflects the design intent and meets the desired specifications. Here’s a comprehensive guide on preparing models for slicing:
1. Model Inspection:
Before preparing a model for slicing, it’s essential to inspect the 3D model for any potential issues. Look for non-manifold geometry, holes, or overlapping faces, as these can cause problems during the slicing process and result in print errors. Use 3D modeling software to repair any defects.
2. Scaling:
Adjust the scale of the model to fit the desired dimensions. Ensure that the size of the model is appropriate for the 3D printer’s build volume. Some slicing software allows for scaling adjustments during the slicing process, but it’s often better to make these adjustments in the 3D modeling software.
3. Orientation:
Consider the optimal orientation of the model for printing. This affects the strength, surface finish, and support requirements. Avoid overhangs beyond the printer’s supported angle and place flat surfaces on the print bed for stability. Experiment with different orientations to find the most efficient and effective positioning.
4. Support Structures:
Identify areas of the model that may require support structures during printing. Overhangs, bridges, and intricate details may need support to prevent sagging or collapsing. Most slicing software allows users to generate automatic supports, but manual placement may be necessary for complex models.
5. Adding Rafts or Brims:
Consider adding a raft or brim to improve bed adhesion. Rafts are additional layers beneath the model that provide a stable foundation, while brims are thin layers extending from the model’s base to enhance adhesion. These features help prevent warping and improve print success rates.
6. Checking Wall Thickness:
Ensure that the model’s walls have adequate thickness. Thin walls can lead to print issues or structural weaknesses. Adjust the wall thickness in the 3D modeling software or within the slicing software settings to meet the printer’s capabilities.
7. Setting Layer Heights:
Determine the layer height based on the desired print resolution. Smaller layer heights result in finer details but may increase print time. Balancing resolution with print speed is essential for achieving the desired print quality.
8. Selecting Infill:
Choose the infill pattern and density based on the desired strength and weight of the printed object. Higher infill percentages result in a denser and stronger print, but also increase material usage and printing time.
9. Exporting in Supported File Formats:
Save or export the 3D model in a file format supported by the slicing software, such as STL or OBJ. Ensure that the file is correctly exported without any missing elements.
10. Importing into Slicing Software:
Open the slicing software and import the 3D model. Confirm that the model’s orientation, size, and other parameters are set according to the desired specifications.
11. Slicing Settings:
Adjust slicing settings in the software, including print speed, temperature, and layer adhesion. Preview the sliced layers to identify any potential issues before generating the final G-code.
Importing Models into IdeaMaker
IdeaMaker is a powerful slicing software designed for use with 3D printers. It allows users to import 3D models, configure various print settings, and generate G-code for 3D printing. Here’s a step-by-step guide on importing models into IdeaMaker:
1. Install IdeaMaker:
First, ensure that you have IdeaMaker installed on your computer. You can download the software from the official Raise3D website or other trusted sources.
2. Launch IdeaMaker:
Open the IdeaMaker software on your computer. The user interface provides various tools and options for configuring print settings and preparing 3D models for printing.
3. Create a New Project:
Start a new project or open an existing one. Projects in IdeaMaker allow you to organize and manage your 3D printing tasks.
4. Importing 3D Models:
To import a 3D model into IdeaMaker, click on the “Import” button or navigate to the “File” menu and select “Import.” Choose the file format of your 3D model (commonly STL or OBJ) and locate the file on your computer.
5. Model Placement and Orientation:
After importing the model, you can manipulate its position and orientation on the virtual build plate. Rotate, scale, or move the model as needed to fit within the print volume and achieve the desired orientation for printing.
6. Layer Preview:
IdeaMaker provides a layer preview feature that allows you to visualize how the model will be sliced layer by layer. This can help identify potential issues and optimize print settings.
7. Adjust Print Settings:
Configure print settings according to your preferences and the requirements of your 3D printer. This includes parameters such as layer height, infill density, print speed, temperature, and support structures. IdeaMaker offers a user-friendly interface for adjusting these settings.
8. Generate Supports if Necessary:
If your 3D model requires support structures, IdeaMaker allows you to generate automatic supports or manually place them as needed. This is crucial for printing overhangs and complex geometries successfully.
Conclusion
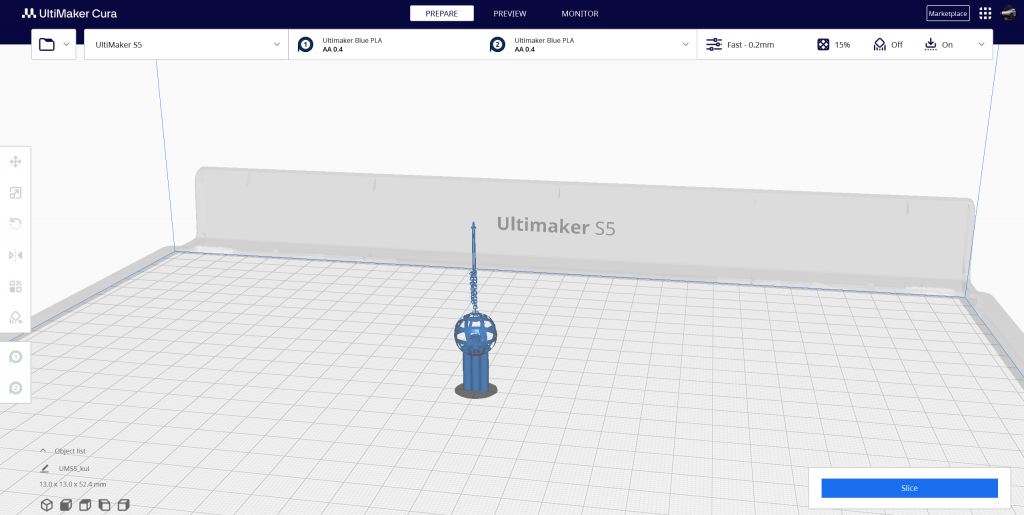
Process of importing models into slicing software, such as IdeaMaker or Cura, is a crucial step in the 3D printing workflow that bridges the gap between intricate 3D designs and the physical manifestation of those designs. Both IdeaMaker and Cura offer user-friendly interfaces and powerful tools to streamline this process, providing a seamless experience for users of all skill levels.
Importing models initiates a series of preparatory steps where users can manipulate the orientation, scale, and placement of the 3D model within the virtual build environment. This flexibility allows for optimal positioning to ensure print success and efficiency. Additionally, the ability to preview layers and inspect the model before printing enables users to identify and address potential issues, contributing to a higher likelihood of a successful print.
Both slicing software options provide a wide array of settings that users can fine-tune to meet their specific requirements. These settings include layer height, infill density, print speed, and support structures. The inclusion of features like automatic support generation and visualizations of the printing process enhances user control and decision-making, ultimately leading to more accurate and satisfactory prints.
Once the model is prepared and settings are configured, the software generates G-code, a set of instructions that guides the 3D printer during the printing process. This G-code serves as a virtual blueprint, dictating how each layer of the object should be constructed. Users can then save the G-code file and transfer it to their 3D printer, initiating the physical realization of the digital design.
In essence, the efficiency and effectiveness of importing models into slicing software contribute significantly to the overall success of 3D printing projects. Whether using IdeaMaker or Cura, users can benefit from intuitive interfaces, advanced features, and a systematic approach to transforming virtual models into tangible creations. As technology continues to advance, these slicing software tools play a vital role in democratizing 3D printing and making it accessible to a broader audience of makers, designers, and enthusiasts.