
Blender is a powerful and versatile open-source 3D content creation suite that caters to a wide range of users, from hobbyists to professional animators, game developers, and visual effects artists. Installing Blender is a straightforward process, and this guide will walk you through the steps to ensure a smooth installation on your system.
Step 1: Downloading Blender
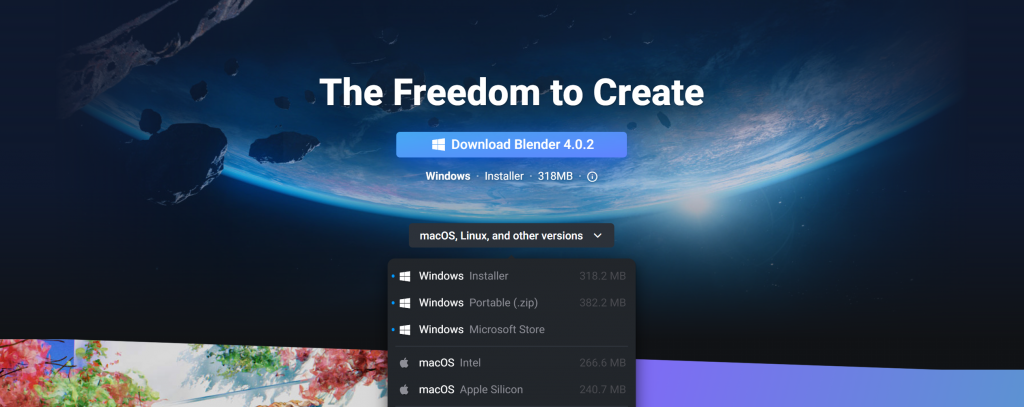
- Visit the Official Blender Website: Navigate to the official Blender website at https://www.blender.org/. The website is user-friendly and provides clear information about the latest version available for download.
- Select Your Operating System: Blender is compatible with Windows, macOS, and Linux. Choose the version that corresponds to your operating system. Blender offers both stable releases and experimental builds; for most users, the stable release is recommended.
- Download Blender: Click on the “Download” button to initiate the download process. Blender is a free and open-source software, so there is no cost associated with downloading or using it.
Step 2: Installing Blender
For Windows:
- Run the Installer: Once the download is complete, locate the downloaded file (usually in your Downloads folder) and double-click on it to run the installer.
- Follow the Installation Wizard: The installation wizard will guide you through the process. You can choose the installation directory and select additional options if needed.
- Complete the Installation: After configuring your preferences, click “Install” to begin the installation process. Once completed, click “Finish” to exit the installer.
For macOS:
- Open the Disk Image: Locate the downloaded Blender file (usually in your Downloads folder) and double-click on it to open the disk image.
- Drag Blender to Applications: Drag the Blender application icon to the Applications folder. This will copy Blender to your Applications directory.
- Run Blender: Navigate to your Applications folder and open Blender. macOS may prompt you to confirm that you want to open an application downloaded from the internet.
For Linux:
- Extract the Archive: After downloading the Blender archive, extract its contents to a location of your choice. You can use the terminal or a file manager to do this.
- Run Blender: Navigate to the extracted folder and run Blender by double-clicking the executable or using the terminal.
Step 3: Verification
- Launch Blender: Open Blender using the shortcut on your desktop or from the Applications menu.
- Check for Updates: Periodically check the official Blender website for updates and new releases. Blender’s development community actively releases updates to improve functionality and address any bugs.
Congratulations! You have successfully installed Blender on your system. Now you can explore the vast array of features and start creating 3D art, animations, and more with this powerful software.
Initial Setup and Configuration
Once you have successfully installed Blender, the next step is to configure the software according to your preferences and optimize it for your workflow. This involves adjusting settings, setting up shortcuts, and configuring the interface to suit your needs. Here’s a guide to help you with the initial setup and configuration in Blender:
1. Opening Blender:
- Launch Blender by double-clicking on the desktop shortcut or selecting it from your Applications menu.
2. Splash Screen:
- When you open Blender, you will be greeted by the splash screen. Here, you can choose to open a new project, load a recent file, or access various templates. Select an option based on your needs.
3. Interface Layout:
- Blender offers different workspace layouts such as Modeling, Sculpting, Animation, and more. Choose a layout that aligns with your primary focus. You can switch between layouts using the tabs at the top of the interface.
4. Viewport Navigation:
- Familiarize yourself with viewport navigation controls. Use the middle mouse button to rotate the view, the scroll wheel to zoom, and Shift + middle mouse button to pan. These controls are essential for smooth navigation within the 3D space.
5. Preferences:
- Access the Preferences window by navigating to “Edit” > “Preferences” or by pressing
Ctrl + Alt + U(Windows/Linux) orCmd + ,(macOS). In Preferences, you can customize various settings.
6. Input Configuration:
- In the Preferences window, go to the “Keymap” section. Here, you can customize keyboard shortcuts to match your preferences or switch to preset keymaps like Maya or 3ds Max if you’re more familiar with those.
7. Themes:
- Blender allows you to change the theme of the interface. In the “Themes” section of Preferences, you can select a predefined theme or create your own by adjusting colors, contrasts, and other visual elements.
8. Add-ons:
- Explore the “Add-ons” section in Preferences. Blender has a vast collection of add-ons that can enhance functionality. Enable the ones you find useful for your workflow.
9. Save Startup File:
- After configuring Blender to your liking, save your preferences as the startup file. Go to “File” > “Defaults” > “Save Startup File.” This ensures that your preferred settings are loaded each time you start Blender.
10. Viewport Shading:
- Experiment with different viewport shading options like Wireframe, Solid, Material Preview, and Rendered. These options are available in the top-right corner of the 3D view.
Troubleshooting Installation Issues
While installing Blender is generally a straightforward process, occasionally, users may encounter issues that prevent a successful installation. Here are some common troubleshooting steps to address potential problems during the installation of Blender:
1. System Requirements:
- Ensure that your system meets the minimum requirements for Blender. Check the official Blender website or documentation for the specific requirements related to your operating system.
2. Download Integrity:
- Verify the integrity of the downloaded Blender file. Corrupted downloads can lead to installation issues. Re-download the file from the official website and attempt the installation again.
3. Antivirus Software:
- Some antivirus programs may interfere with the installation process. Temporarily disable your antivirus software during the installation, or add Blender to the list of allowed applications.
4. Administrator Privileges:
- On Windows, ensure that you have administrator privileges when running the installer. Right-click on the installer and select “Run as administrator” to avoid permission issues.
5. Firewall Settings:
- Check your firewall settings to ensure that Blender is not being blocked. Adding Blender to the list of allowed applications in your firewall settings can prevent connectivity issues during the installation.
6. Compatibility Mode:
- On Windows, try running the installer in compatibility mode. Right-click on the installer, select “Properties,” go to the “Compatibility” tab, and choose a compatibility mode that matches your operating system.
7. Disk Space:
- Ensure that you have sufficient disk space for the installation. Lack of disk space can lead to incomplete installations or errors. Free up space on your drive and attempt the installation again.
8. Temporary Files and Folders:
- Clear temporary files and folders on your system. Use disk cleanup tools or manually delete temporary files to ensure a clean installation environment.
9. Update Graphics Drivers:
- Outdated or incompatible graphics drivers can cause issues with Blender. Update your graphics drivers to the latest version compatible with your GPU.
10. Check System Logs:
- Examine system logs for any error messages related to the installation. Logs can provide valuable information about what went wrong. Check system logs on Windows, macOS, or Linux depending on your operating system.
11. Try a Different Version:
- If you encounter issues with the latest version, try installing a different version of Blender. You can find previous releases on the Blender website. Sometimes, an older version may be more compatible with your system.
12. Consult Community Forums:
- Visit Blender community forums or user groups to seek assistance. Others may have encountered similar issues and can provide valuable insights or solutions.
13. Contact Support:
- If all else fails, consider reaching out to Blender’s official support channels or community forums for assistance. Provide detailed information about the issue, including error messages, and seek guidance from experienced users or developers.
By systematically addressing these common troubleshooting steps, you increase the likelihood of resolving installation issues and successfully installing Blender on your system. If persistent problems persist, seeking help from the Blender community or support channels is a recommended course of action.