
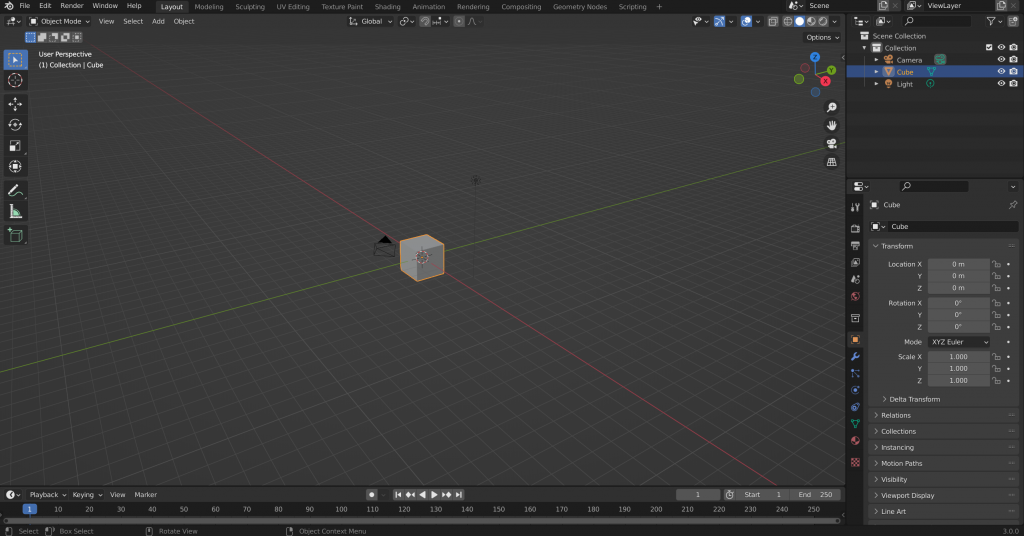
Blender is a powerful open-source 3D computer graphics software that is widely used for creating animated films, visual effects, art, 3D games, and more. Its user interface (UI) might seem a bit overwhelming for beginners, but understanding its layout and components can make the learning process smoother.
Let’s explore the main components of Blender’s UI:
- Header:
- Located at the top of the application window, the header contains various menus and options for different modes and functionalities. For example, you’ll find menus for file operations, editing, rendering, and more.
- Tool Shelf:
- The tool shelf is typically on the left side of the 3D Viewport. It provides quick access to various tools and settings relevant to the active mode or task. You can toggle its visibility with the “T” key.
- Properties Panel:
- On the right side of the 3D Viewport, you’ll find the properties panel. It contains settings and parameters for the selected object or scene. You can toggle its visibility with the “N” key.
- 3D Viewport:
- The central part of the UI where you interact with and manipulate 3D objects. This is where you’ll be modeling, sculpting, animating, and more.
- Timeline/Animation Area:
- At the bottom of the default layout, you’ll find a timeline that allows you to control animation and keyframes. Blender has a powerful animation system that can be explored here.
- Outliner:
- Usually located in the top-right or bottom-right corner, the Outliner provides a hierarchical view of all the objects in your scene. You can select, organize, and manage objects from this panel.
- Info Editor:
- At the top of the screen, the Info Editor displays information about your actions, such as keyboard shortcuts and tooltips.
- Status Bar:
- At the very bottom of the Blender window, the status bar shows information about the current mode, scene statistics, and other details.
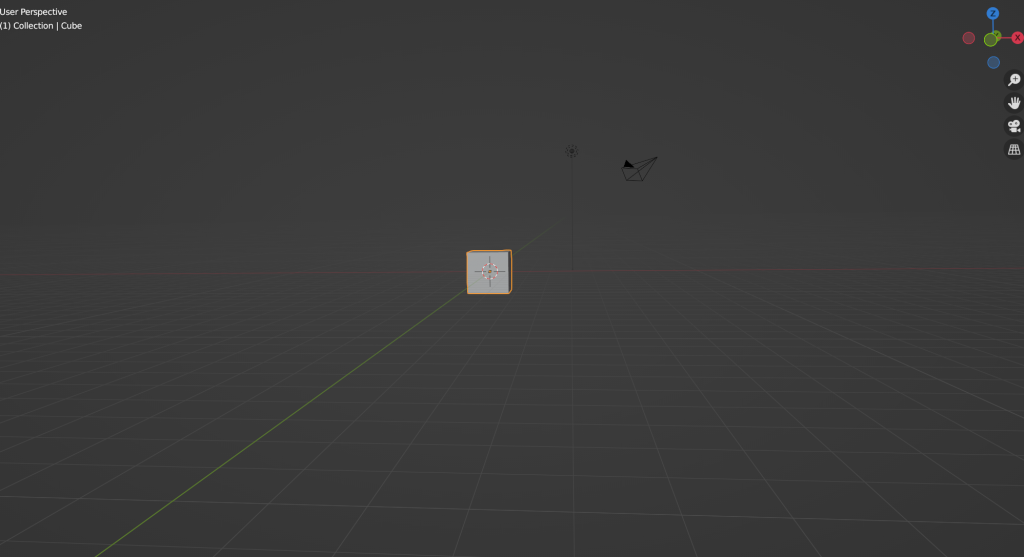
- Viewport Navigation:
- Blender’s 3D Viewport supports various navigation methods. You can pan, zoom, and rotate the view using the middle mouse button and keyboard shortcuts.
- Header of Editors:
- Each editor (like the UV Editor, Image Editor, etc.) has its own header with specific options and settings relevant to that editor.
Remember that Blender’s UI is highly customizable. You can rearrange and resize panels, create custom layouts, and even create your own workspace. Additionally, Blender uses a right-click select paradigm by default, which might be different from other 3D software.
Blender’s UI might seem complex initially, but with practice, it becomes intuitive, and the flexibility it offers becomes a significant advantage for users. There are plenty of tutorials and resources available online to help you get started and master Blender’s UI and features.
Layouts and Workspaces
In Blender, Layouts and Workspaces play a crucial role in customizing the user interface to suit different tasks and workflows. Understanding how to create, switch between, and customize layouts and workspaces is essential for improving efficiency and tailoring the software to your specific needs.
Layouts:
Layouts refer to the arrangement of panels and editors within the Blender interface. Blender comes with several predefined layouts that cater to different tasks, such as modeling, sculpting, animating, and compositing. The default layout consists of the 3D Viewport, Properties Panel, Timeline, and Tool Shelf, but you can create and save custom layouts to streamline your workflow.
Key aspects of Layouts:
- Creating Custom Layouts:
- To create a custom layout, arrange the panels as desired, and then go to the top-left corner of the screen. Click on the “+” icon next to the current layout name, and choose “New.” You can rename the layout and save it for future use.
- Switching Between Layouts:
- Blender allows you to switch between layouts easily. Use the layout dropdown menu in the top-left corner of the screen to choose from the available layouts. You can also use the default number keys (1-9) for quick access.
- Adjusting Panel Sizes:
- Panels in Blender can be resized and rearranged according to your preferences. Hover over the border between two panels, and when the cursor changes to a double-headed arrow, click and drag to adjust the size.
Workspaces:
Workspaces are specialized setups that organize layouts, editors, and tools for specific tasks. Each workspace is designed for a particular type of work, such as modeling, sculpting, shading, animation, and more. Blender comes with a set of default workspaces, and you can also create and customize your own.
Key aspects of Workspaces:
- Default Workspaces:
- Blender includes several default workspaces accessible from the top of the interface. Examples include Modeling, Sculpting, Animation, and Compositing. Each workspace is preconfigured with relevant editors and tools for its intended purpose.
- Creating Custom Workspaces:
- To create a custom workspace, arrange the desired editors and tools, then click on the “+” icon next to the current workspace name and choose “New.” You can rename the workspace, and it will appear in the workspace dropdown menu.
- Switching Between Workspaces:
- Use the workspace dropdown menu or the default number keys (1-9) to switch between predefined and custom workspaces. This allows you to quickly transition between different tasks without manually rearranging the interface each time.
- Workspace Tabs:
- Workspaces are organized into tabs, making it easy to group related tasks. You can add, remove, and rearrange these tabs based on your workflow.
By utilizing layouts and workspaces effectively, Blender users can optimize their workspace for specific tasks and streamline their workflow. Whether you’re modeling, animating, or working on visual effects, having the right combination of panels and tools readily available can significantly enhance your productivity and overall experience with Blender.
Panels and Editors
In Blender, panels and editors are essential components of the user interface, providing users with the tools and functionality needed for various tasks such as modeling, animation, rendering, and more. Understanding how panels and editors work is fundamental to navigating and using Blender efficiently.
Panels:
Panels in Blender refer to the distinct sections within an editor or workspace. They contain specific tools, settings, and options related to the active task or mode. The interface is designed with multiple panels, each serving a unique purpose.
Key aspects of Panels:
- Tool Shelf:
- Located on the left side of the 3D Viewport, the Tool Shelf is a vertical panel that provides quick access to various tools relevant to the active mode or task. You can toggle its visibility with the “T” key.
- Properties Panel:
- Situated on the right side of the 3D Viewport, the Properties Panel contains settings and parameters for the selected object or scene. You can toggle its visibility with the “N” key.
- Outliner:
- The Outliner, often found on the right side of the interface, offers a hierarchical view of all objects in the scene. It allows users to organize, select, and manage objects easily.
- Timeline and Animation Panels:
- At the bottom of the default layout, the Timeline panel assists in controlling animation and keyframes. It provides a visual representation of the animation sequence.
- Info Editor:
- At the top of the Blender window, the Info Editor displays information about actions, keyboard shortcuts, and tooltips. It provides helpful details for users as they interact with the software.
Editors:
Editors in Blender are specialized views or windows designed for specific tasks. Each editor is tailored to facilitate a particular type of work, such as modeling, sculpting, texturing, shading, and more. Users can switch between editors to access the tools and features required for their workflow.
Key aspects of Editors:
- 3D Viewport:
- The central and most crucial editor in Blender, the 3D Viewport, allows users to interact with and manipulate 3D objects. It supports various modes such as Object Mode, Edit Mode, Sculpt Mode, etc.
- UV Editor:
- Specifically designed for working with UV mapping and texturing, the UV Editor provides a 2D view of the unwrapped UV layout of a 3D model.
- Image Editor:
- Used for editing and manipulating images, the Image Editor is essential for tasks like texture painting and image compositing.
- Node Editor:
- Found in the Shading workspace, the Node Editor allows users to create and manipulate material node networks for realistic shading and rendering.
- Text Editor:
- Designed for scripting and coding, the Text Editor enables users to write and execute Python scripts to automate tasks or create custom tools.
- Video Sequence Editor (VSE):
- Used for video editing and compositing, the VSE allows users to arrange and edit video clips, add effects, and create a final video output.
- Dope Sheet and Graph Editor:
- These editors are dedicated to animation. The Dope Sheet provides a high-level view of keyframes, while the Graph Editor allows for detailed control over animation curves.
Understanding the organization of panels and editors in Blender is crucial for navigating the interface efficiently and making the most of its powerful 3D modeling and animation capabilities. As users become familiar with the various editors and panels, they can optimize their workspace to suit their specific workflows and tasks.
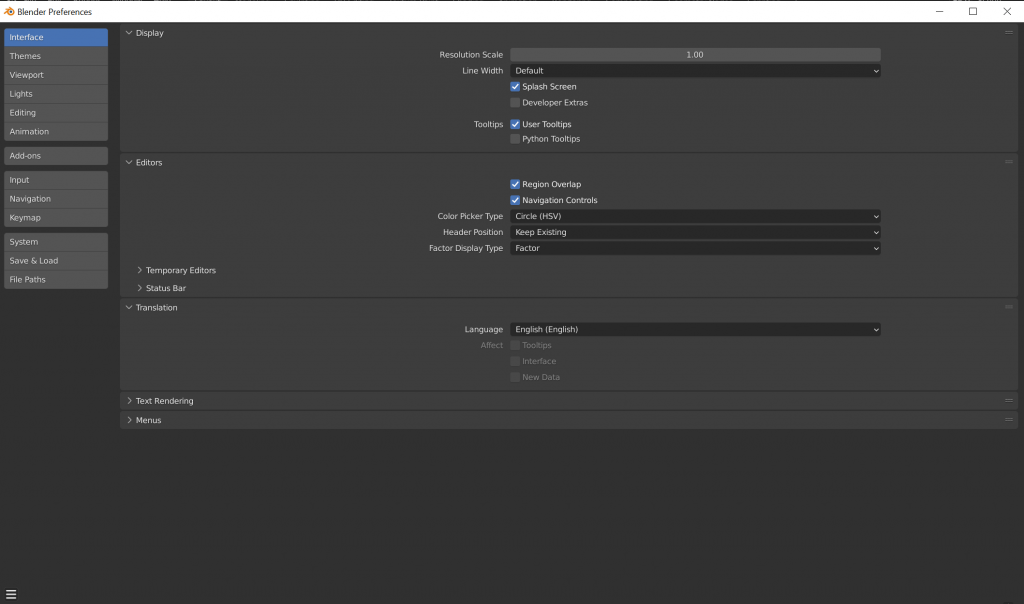
Display and Theme Preferences
In Blender, the Display and Theme Preferences are crucial aspects of the user interface customization. These settings allow users to personalize the look and feel of Blender to enhance readability, aesthetics, and overall user experience.
Display Preferences:
- Viewport Display:
- In the Display preferences, users can control settings related to the 3D Viewport, such as the display of wireframes, shading options, and overlays. Users can customize how objects are displayed, including the use of outlines and X-ray modes.
- Grid and Axis:
- Users can configure the grid’s visibility, scale, and axis display options. These settings help in aligning and orienting objects within the 3D space.
- Navigation:
- Display preferences also include settings related to navigation, allowing users to choose between trackball and turntable navigation styles. These settings impact how users interact with the 3D Viewport.
- Screenshots and Render:
- Users can define the format and location for saving screenshots captured within Blender. Additionally, there are options to configure the default render settings, such as image format, compression, and output location.
Theme Preferences:
- Theme Presets:
- Blender offers a variety of theme presets, allowing users to quickly change the overall color scheme and appearance of the interface. Themes range from light to dark and can significantly impact the visual style of Blender.
- Customizing Colors:
- Users have the flexibility to customize individual colors for various interface elements. This includes background colors, text colors, highlight colors, and more. This level of customization enables users to create a visual environment that suits their preferences.
- Font and Interface Size:
- Blender allows users to choose their preferred font for the interface and adjust the size of the text. This is especially useful for users with different display resolutions and preferences for text readability.
- Custom Icons:
- Users can customize icon colors and shapes in the Theme preferences. This feature allows for a more personalized and visually distinct iconography within the interface.
- High Contrast Themes:
- Blender includes high contrast themes designed to improve visibility for users with visual impairments. These themes emphasize color contrasts to make the interface elements more discernible.
- Gradient Colors:
- Users can enable or disable gradient colors in the interface. This preference affects the appearance of gradients in various elements, providing additional control over the overall visual style.
By leveraging the Display and Theme Preferences, users can create a personalized and comfortable working environment in Blender. Whether it’s adjusting the viewport display settings for better navigation or fine-tuning the color scheme for improved readability, these preferences empower users to tailor Blender to their individual preferences and workflow requirements.
Multiple Windows and Splitting Views
In Blender, the ability to work with multiple windows and split views is a powerful feature that enhances productivity and flexibility in 3D modeling, animation, and rendering. Understanding how to create, manage, and customize multiple windows allows users to tailor their workspace to specific tasks and workflows.
Creating Multiple Windows:
- Window Types:
- Blender supports various types of windows, each dedicated to specific tasks. Common windows include the 3D Viewport, UV/Image Editor, Node Editor, and more. Users can create these windows to focus on different aspects of their project simultaneously.
- Window Creation:
- To create a new window, place the cursor over the corner of an existing window until it turns into a double-headed arrow. Right-click and choose “Split Area” or use the keyboard shortcut (Ctrl+Space) to bring up the Split menu. This menu allows users to split the existing area horizontally or vertically.
- Changing Window Types:
- Once a new window is created, users can change its type by selecting a different editor from the Editor Type menu. This allows for a seamless transition between 3D modeling, texturing, shading, and other tasks without disrupting the overall workspace.
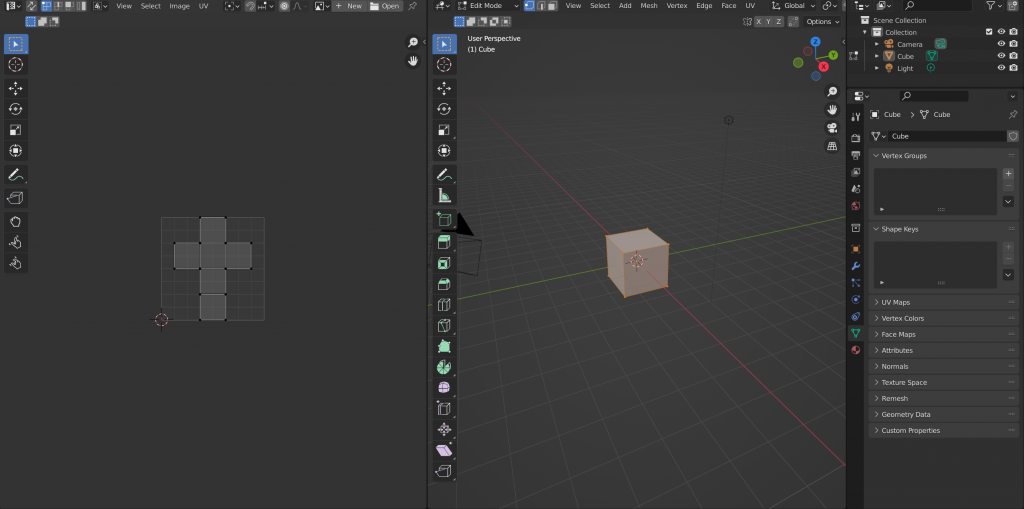
Splitting Views:
- Horizontal and Vertical Splits:
- Blender allows users to split views both horizontally and vertically. This flexibility enables users to arrange multiple views side by side or one above the other. This is particularly useful for comparing different angles, working on multiple objects simultaneously, or referencing different parts of a scene.
- Joining Windows:
- Users can join split windows back into a single window by placing the cursor over the window border, right-clicking, and choosing “Join Areas.” This action merges the selected window with its neighboring window.
- Navigating Multiple Views:
- Navigating multiple views is intuitive in Blender. Users can adjust the active view by clicking in the desired window or using keyboard shortcuts like Ctrl+Left Arrow and Ctrl+Right Arrow.
- Window and Screen Layouts:
- Blender allows users to save and switch between different screen layouts. This includes the arrangement of multiple windows, their types, and their sizes. Users can access these layouts quickly from the top bar of the interface.
Use Cases for Multiple Windows:
- Reference Images:
- Users can load reference images into one window while working on the 3D model in another. This is helpful for maintaining accuracy and consistency when modeling based on a reference.
- Animation Workflow:
- When animating, users can have a dedicated window for the timeline, graph editor, and 3D Viewport simultaneously. This facilitates a smoother animation workflow.
- Shader Editing:
- When working on materials and shaders, having the Node Editor open alongside the 3D Viewport allows users to see real-time changes.
- Simultaneous Texturing:
- For texture painting or UV unwrapping, users can have the UV/Image Editor open alongside the 3D Viewport to visualize changes in real time.
By leveraging the ability to create multiple windows and split views, Blender users can enhance their workflow, improve visibility, and streamline their creative process. This feature is particularly valuable for users working on complex projects that require simultaneous attention to different aspects of the scene or model.
Conclusion
Gaining a solid understanding of the user interface in Blender is a foundational step for anyone looking to harness the power of this versatile 3D software. The UI, with its diverse components such as headers, tool shelves, and editors, provides a framework for efficient interaction with the multitude of features Blender offers.
Navigating the interface, customizing layouts and workspaces, and becoming familiar with panels and editors are essential skills that empower users to tailor Blender to their specific needs. As users delve into the intricacies of multiple windows, splitting views, and theme preferences, they unlock a level of customization that enhances productivity and creates a comfortable and personalized working environment.
While Blender’s UI may appear daunting initially, perseverance in exploring its elements pays off, as it grants access to a powerful set of tools for 3D modeling, animation, rendering, and more. Ultimately, a mastery of Blender’s user interface opens the door to a world of creative possibilities, allowing users to bring their artistic visions to life in the realm of 3D design and animation.