
Blender, a powerful and versatile open-source 3D creation suite, offers a comprehensive set of tools for modeling, texturing, animating, and rendering. Central to the Blender experience is the 3D Viewport, a dynamic workspace that allows users to interact with their 3D scenes in real-time. Navigating the 3D Viewport efficiently is crucial for any Blender artist, whether they are beginners or seasoned professionals.
Understanding the 3D Viewport:
The 3D Viewport in Blender is where you’ll spend the majority of your time working on your projects. It serves as the window into your 3D world, displaying the scene from various angles and perspectives. The viewport is highly customizable, offering different shading modes, overlays, and display options to suit different workflow preferences.
Viewport Navigation Shortcuts:
Blender provides a set of intuitive and efficient shortcuts for navigating the 3D Viewport. Here are some essential navigation controls:
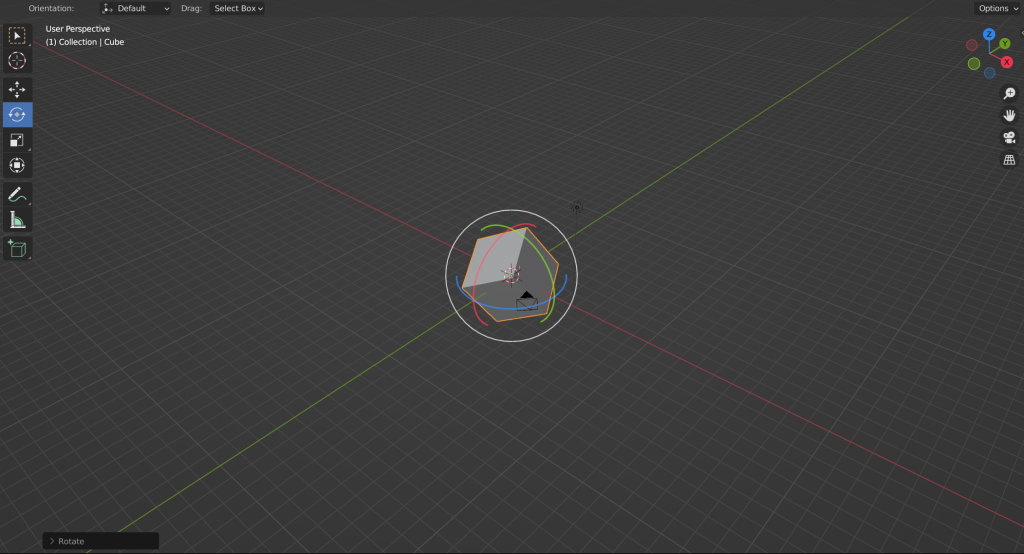
- Rotate View (Orbit):
- Middle Mouse Button (MMB): Click and drag to orbit the view.
- Numpad 4, 6, 2, 8: Orbit the view left, right, down, and up, respectively.
- Pan View:
- Shift + MMB: Click and drag to pan the view.
- Numpad 1, 3, 7, 9: Pan the view in the corresponding direction.
- Zoom In/Out:
- Scroll Wheel: Scroll up to zoom in, and down to zoom out.
- Numpad + and -: Zoom in and out.
- View Presets:
- Numpad 0: Switch to the camera view.
- Numpad 5: Toggle between perspective and orthographic view.
- Frame Selected:
- Numpad . (period): Frame the view to focus on the selected object.
Transforming Objects:
Besides navigating the 3D Viewport, understanding how to manipulate objects is essential. Blender provides tools for translating, rotating, and scaling objects:
- Translate:
- G: Grab/move an object.
- G + X, Y, Z: Grab along the X, Y, or Z axis.
- Rotate:
- R: Rotate an object.
- R + X, Y, Z: Rotate around the X, Y, or Z axis.
- Scale:
- S: Scale an object uniformly.
- S + X, Y, Z: Scale along the X, Y, or Z axis.
Mastering the navigation of Blender’s 3D Viewport is a fundamental step toward becoming proficient in the software. As you delve deeper into your projects, you’ll find that a solid understanding of viewport navigation and object manipulation will greatly enhance your workflow and creative capabilities within the Blender environment.
Viewport Navigation Modes
Viewport navigation modes in Blender refer to the different ways you can manipulate and interact with the 3D Viewport to navigate and view your scenes. Blender provides several navigation modes, each tailored to specific tasks and preferences, offering users flexibility and efficiency in their workflows. Understanding and mastering these modes can significantly enhance your overall experience in working with 3D environments. Here are some key viewport navigation modes in Blender:
1. Orbit Mode:
- Action: Rotating the view around the scene.
- Shortcut: Middle Mouse Button (MMB) or Numpad 4, 6, 2, 8.
2. Pan Mode:
- Action: Shifting the view horizontally or vertically without changing the viewpoint.
- Shortcut: Shift + MMB or Numpad 1, 3, 7, 9.
3. Zoom Mode:
- Action: Adjusting the zoom level to get a closer or wider view of the scene.
- Shortcut: Scroll Wheel or Numpad + and -.
4. Fly Mode:
- Action: Simulating a first-person flying experience through the scene.
- Shortcut: Shift +
(backtick) while in the 3D Viewport.
5. Walk Mode:
- Action: Navigating through the scene as if walking.
- Shortcut: Shift +
(backtick) and use WASD keys for movement.
6. Zoom to Border:
- Action: Drawing a rectangle to zoom in on a specific area.
- Shortcut: Ctrl + B and then drag to create a rectangle.
7. Turntable and Trackball:
- Turntable Mode: Rotates around a fixed point, useful for turntable animations.
- Trackball Mode: Rotates around the current view center, providing a more freeform rotation.
- Switching: Located in the “View” menu at the bottom of the 3D Viewport.
8. Walk/Fly Navigation (3D Viewport Gizmo):
- Action: Utilizing a visual gizmo for walking or flying navigation.
- Toggle Gizmo: Located in the top right corner of the 3D Viewport.
9. Camera View:
- Action: Switching to the active camera’s perspective.
- Shortcut: Numpad 0.
10. Orthographic/Perspective Toggle:
- Action: Switching between orthographic and perspective views.
- Shortcut: Numpad 5.
11. Center and Fit View:
- Action: Centering the view on the selected object or fitting all objects in the view.
- Shortcut: Numpad . (period) or Shift + C (Center) or Shift + F (Fit).
Viewport Display Options
Viewport display options in Blender provide users with the ability to customize the appearance of the 3D Viewport, allowing for a more efficient and focused workflow. These options give users control over how objects, lights, and other elements are displayed in the viewport, aiding in tasks such as modeling, animation, and scene organization. Understanding and utilizing these display options can significantly enhance the user experience in Blender. Here are some key viewport display options:
1. Shading Modes:
- Wireframe: Displays only the wireframe of objects.
- Solid: Shows solid, shaded surfaces.
- Material Preview: Displays materials and basic shading.
- Rendered: Provides a real-time preview with lighting and materials similar to the final render.
2. Overlay Options:
- Grid: Toggles the grid floor visibility.
- Axis: Displays the X, Y, and Z axes.
- Text Information: Shows information overlays such as frame rate and object statistics.
- Geometry Gizmo: Visual gizmos for transforming objects.
- Annotations: Allows drawing and adding annotations directly in the 3D Viewport.
3. Object Types Visibility:
- Eye Icon in Outliner: Toggles object visibility.
- Restriction Toggles (Render, Selectability, etc.): Controls the visibility and selectability of specific objects.
4. Viewport Shading Options:
- Matcap: Uses Material Capture to display materials in the viewport.
- Texture: Displays textures on objects in the viewport.
- Studio: Simulates studio lighting for a consistent shading environment.
- World Background: Displays the world background in the viewport.
5. Outline and X-Ray Modes:
- Outline: Highlights the selected object with an outline for better visibility.
- X-Ray: Makes objects transparent, allowing you to see through them.
6. Viewport Display Settings for Lights and Cameras:
- Show/Hide Lights: Toggles the visibility of lights in the viewport.
- Show/Hide Cameras: Controls the visibility of cameras.
7. Display As Bounds:
- Bounding Box: Displays objects as simple bounding boxes for improved performance.
- Wire: Shows objects as wireframes.
8. Clipping and Depth of Field:
- Clip Start/End: Adjusts the distance range for displaying objects.
- Depth of Field: Simulates real-world camera focus in the viewport.
9. Pie Menus and Quick Favorites:
- Customizable Pie Menus and Quick Favorites: Allows users to create custom menus for quick access to frequently used display options.
Understanding and utilizing viewport display options in Blender is crucial for tailoring the 3D Viewport to meet specific workflow needs. Whether you are focusing on precise modeling, animation, or scene organization, these options empower users to create a more comfortable and efficient working environment. Regularly exploring and integrating these display features into your workflow can significantly contribute to a more streamlined and enjoyable 3D creation experience in Blender.
Conclusion
Mastering the art of navigating the 3D Viewport in Blender is a fundamental skill that significantly contributes to a smooth and efficient 3D creation experience. The diverse set of navigation tools, shortcuts, and customization options empower users to seamlessly explore and interact with their virtual worlds. Whether orbiting around objects, panning across scenes, or zooming in for detailed work, understanding the nuances of viewport navigation is essential for precision and creativity.
By incorporating shortcuts like the Middle Mouse Button (MMB) for orbiting, Shift + MMB for panning, and the Scroll Wheel for zooming, users can effortlessly move through their 3D environments. Additional features like Fly Mode, Walk Mode, and camera perspectives provide versatile navigation experiences tailored to specific tasks. Customization options such as saved views, hotkeys, and gizmos further enhance user control, enabling a more personalized and efficient workflow.
As Blender continues to evolve, exploring new features and staying acquainted with navigation enhancements becomes crucial. Whether you are a novice or an experienced artist, continuous practice and experimentation with viewport navigation tools will undoubtedly lead to a heightened level of proficiency, ultimately unlocking the full potential of your creative endeavors within the dynamic realm of Blender’s 3D Viewport.