
Error checking is a crucial step in the 3D printing workflow, especially when using software like Blender to create models. Ensuring that your 3D model is error-free before sending it to the printer can save time, material, and frustration. Here are several reasons highlighting the importance of error checking for 3D printing in Blender:
- Print Success Relies on Model Integrity:
- A successful 3D print is highly dependent on the integrity of the 3D model. Errors in the model can lead to printing failures, including misprints, structural issues, or incomplete prints.
- Avoid Printing Flaws:
- Identifying and fixing errors before printing helps avoid common flaws such as non-manifold geometry, overlapping faces, or intersecting geometry. These issues can result in unpredictable printing behavior and negatively impact the final print quality.
- Save Material and Time:
- 3D printing materials can be expensive, and failed prints waste both material and time. Error checking helps catch potential problems early in the design process, reducing the likelihood of failed prints and minimizing material wastage.
- Ensure Structural Integrity:
- Error-free models contribute to the structural integrity of the printed object. Unresolved issues like thin walls, inverted normals, or non-watertight geometry can compromise the physical strength and stability of the printed object.
- Enhance Printability:
- Certain features, like intricate details or fine structures, may be challenging to print. Error checking allows you to identify and address issues that could affect the printability of these features, improving the chances of successful reproduction.
- Optimize Support Structure Placement:
- Identifying potential overhangs or unsupported features in your model is essential for proper support structure placement. Error checking helps you identify areas that may require additional supports, reducing the risk of print failures due to collapsed or sagging features.
- Improve Print Bed Adhesion:
- Error checking can help ensure that the bottom surface of the model is flat and suitable for proper bed adhesion. This is crucial for preventing warping and detachment issues during printing.
- Reduce Post-Processing Efforts:
- Models with errors may require more extensive post-processing to fix issues such as gaps, holes, or distorted geometry. Error checking in Blender allows you to address these issues early on, minimizing the need for time-consuming post-processing.
- Enhance Overall Print Quality:
- Error-free models contribute to better print quality. By addressing potential problems in the design phase, you increase the likelihood of achieving a high-quality, accurate, and visually appealing 3D print.
- Learn and Iterate:
- Reviewing and fixing errors provides a valuable learning experience. It helps you understand common pitfalls in 3D modeling and encourages an iterative design approach, leading to continuous improvement in your 3D printing skills.
In conclusion, error checking in Blender is a fundamental step in the 3D printing process. It contributes to the overall success of your prints by ensuring model integrity, printability, and structural soundness, ultimately saving time and resources while improving the quality of the final printed object.
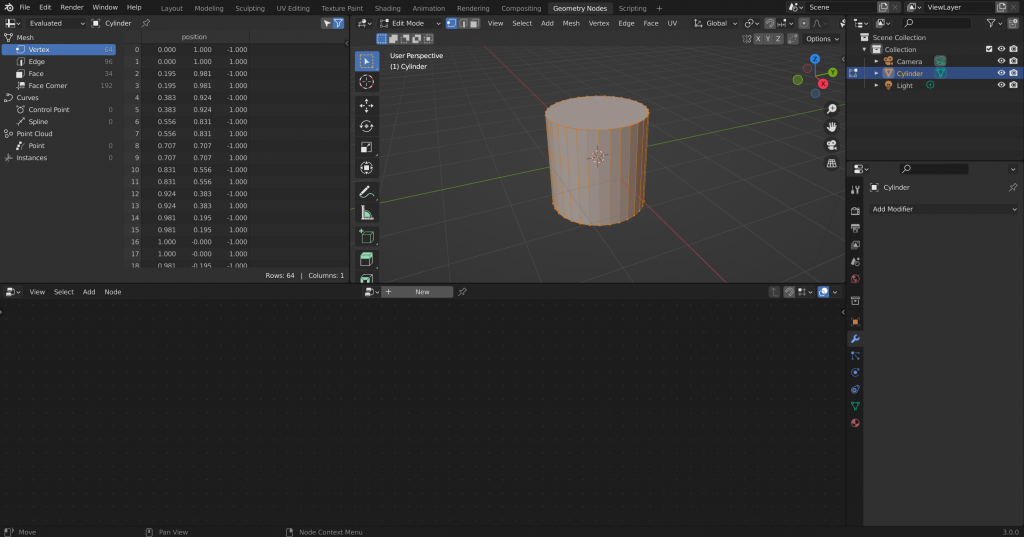
Checking Mesh Integrity
Checking mesh integrity in Blender is a crucial step in the 3D modeling process to ensure that your model is free from errors and suitable for various applications, including 3D printing, rendering, and animation. Mesh integrity issues can lead to printing failures, rendering artifacts, and other undesired outcomes. Here are steps and considerations for checking mesh integrity in Blender:
1. Select the Mesh:
- In Blender, select the mesh you want to check. This can be done by right-clicking on the mesh object in the 3D Viewport.
2. Enter Edit Mode:
- Press the Tab key to enter Edit Mode. This mode allows you to manipulate the individual components of the mesh, such as vertices, edges, and faces.
3. Check for Non-Manifold Geometry:
- Non-manifold geometry refers to elements in the mesh that don’t adhere to standard geometric rules. In Edit Mode, select “Select” from the 3D Viewport header and choose “Non-Manifold.” This highlights any non-manifold geometry, such as edges shared by more or fewer than two faces.
4. Inspect Overlapping Faces:
- Overlapping faces can cause rendering artifacts and printing issues. In Edit Mode, select “Select” and choose “Faces by Sides.” Look for faces with more than three sides, as these might indicate overlapping or intersecting geometry.
5. Check Normals:
- Normals determine the direction in which faces are visible. Inconsistent or inverted normals can lead to shading problems. Enable “Face Orientation” in the Overlay dropdown menu in the 3D Viewport to visualize face normals. Select all faces and recalculate normals using
Ctrl + Nto ensure they point outward.
6. Inspect for Duplicate Vertices:
- Duplicate vertices can cause issues during rendering and 3D printing. In Edit Mode, select all vertices (
A) and choose “Merge” > “By Distance” to remove any duplicates.
7. Ensure Watertight Geometry:
- For 3D printing and other applications, it’s essential that the mesh is watertight, meaning there are no gaps or holes. Use the “Select” > “Select All by Trait” > “Non-Manifold” to identify any potential issues.
8. Check Edge Flow:
- A clean and organized edge flow contributes to better deformation in animations and smoother subdivision surfaces. Manually inspect the mesh in Edit Mode to ensure edges flow logically and don’t create unnecessary loops or spirals.
9. Use the 3D Print Toolbox Add-on:
- Blender has a built-in 3D Print Toolbox add-on that can help you check and fix common issues for 3D printing. Enable this add-on in the Preferences, and you’ll find a set of tools under the “3D Print” tab in the “N” panel.
10. Regularly Inspect Your Mesh:
- Mesh integrity is an ongoing concern, especially during the modeling process. Regularly inspect and check your mesh as you work to catch and fix issues early on.
11. Run External Validators:
- Consider using external mesh validation tools or online services to perform additional checks on your mesh. These tools can sometimes catch issues that may be overlooked.
By following these steps and considerations, you can ensure that your mesh in Blender is free from common issues, making it suitable for a variety of applications, including 3D printing. Regularly checking mesh integrity as part of your modeling workflow contributes to better overall model quality and reduces the likelihood of problems down the line.
Reviewing Model Dimensions
Reviewing model dimensions in Blender is a crucial step to ensure that your 3D models are accurately scaled and match the intended real-world dimensions. This is particularly important when preparing models for 3D printing, architectural visualization, or any application where precise measurements are essential. Here’s a guide on how to review and adjust model dimensions in Blender:
1. Units and Scale Settings:
- Before diving into specific measurements, ensure that you have set the correct units and scale for your project. Blender allows you to work with various units such as meters, centimeters, inches, etc. You can find these settings in the Scene tab of the Properties panel.
2. Use the Measure Tool:
- Blender provides a handy Measure tool that allows you to measure distances between points. In Object Mode, press “Space” to open the search menu and type “Measure.” Choose the “Measure” tool and click on two points to see the distance between them.
3. Check Object Dimensions:
- In Object Mode, select the object you want to inspect and go to the Object tab in the Properties panel. Here, you’ll find the dimensions of the selected object. Ensure that these dimensions align with your intended scale.
4. Scaling Objects:
- If you find that your model’s dimensions are incorrect, you can scale the object accordingly. Press “S” to enter scale mode, and then input the desired scaling factor. Note that this operation might affect other aspects of your model, so use it judiciously.
5. Use the Ruler/Protractor Tool:
- Blender has a Ruler/Protractor tool that allows you to measure angles and distances. Activate it by pressing “Ctrl + Space” to switch to the 3D Cursor tool, and then choose “Distance” or “Angle” from the tool settings.
6. Grid and Snap Settings:
- Blender’s grid can also serve as a visual reference for object dimensions. Adjust the grid scale in the View tab of the Properties panel. Additionally, enable snapping options (vertex, edge, face) to help align objects to specific points on the grid.
7. Scene Units and Scene Scale:
- In the Scene properties, under Units, you can set the overall scale for the entire scene. This ensures consistency across all objects within the scene.
8. Use Numerical Input:
- When making adjustments, you can enter precise numerical values in Blender. For example, pressing “S” to scale and then typing “2” will double the size of the selected object.
9. Import and Export Scale Considerations:
- When importing or exporting models, be mindful of the scale settings. Some file formats may have different default scales, leading to discrepancies between software. Adjust scales accordingly during import/export operations.
10. Check Multiple Views:
- Inspect your model from various angles to ensure that dimensions are correct from all perspectives. Switch between orthographic and perspective views to get a comprehensive understanding of your model’s scale.
11. Use Reference Objects:
- Introduce reference objects with known dimensions to cross-check your model’s scale. For instance, add a cube with specific dimensions and compare it to your model.
12. Documentation and Notes:
- Keep track of your model’s intended dimensions in your project documentation or notes. This helps you maintain consistency and facilitates collaboration with others.
Regularly reviewing and adjusting model dimensions in Blender is essential for creating accurate and professional 3D models. Whether you’re working on architectural designs, product visualizations, or 3D prints, ensuring precise dimensions is key to the success of your project.
Analyzing Fine Details
Analyzing fine details in Blender is an essential aspect of 3D modeling, particularly when creating intricate or realistic models for applications such as animation, rendering, or 3D printing. Here’s a guide on how to analyze fine details in Blender:
1. Zooming and Panning:
- Use Blender’s navigation tools to zoom in and pan around your model. This allows you to closely inspect fine details without obstruction. The mouse scroll wheel and middle mouse button are commonly used for these actions.
2. Viewport Shading:
- Experiment with different viewport shading modes in Blender. Switch between solid, wireframe, and rendered modes to evaluate how fine details appear under different rendering conditions.
3. High-Resolution Textures:
- If your model includes textures, ensure that you are using high-resolution textures to capture fine surface details. Adjust the texture mapping coordinates to align textures properly with the model’s geometry.
4. Subdivision Surface Modifier:
- Use the Subdivision Surface modifier to add additional geometry and smooth out surfaces. This is particularly useful for creating smooth, detailed surfaces, especially when working on organic or curved forms.
5. Use High-Poly Models:
- For static renders or scenes where performance is not a major concern, consider working with high-poly models to capture fine details. High-poly models can represent intricate forms more accurately.
6. Sculpt Mode:
- Blender’s Sculpt Mode is a powerful tool for adding fine details to models. Use brushes like the Crease brush or Clay Strips brush to refine surfaces and create intricate features. Dynamic Topology can also be enabled to add geometry where needed.
7. Microdisplacement:
- If you are using Blender’s Cycles renderer, take advantage of microdisplacement for detailed and realistic surfaces. This feature allows you to use high-resolution height maps to displace geometry at a micro-level.
8. Check Normals:
- Ensure that the normals of your model are facing outward. Incorrect normals can lead to shading issues and obscure fine details. In Edit Mode, select all faces and recalculate normals (
Ctrl + N).
9. Use Beveling:
- Beveling edges can add realism and catch highlights, especially on hard surfaces. The Bevel modifier or manually adding bevels in Edit Mode can enhance the appearance of fine details.
10. Edge Loops and Rings:
- Carefully place edge loops and rings to define and emphasize fine details. Strategic use of edge loops can help maintain smoothness and control the flow of details across the surface.
11. Bump and Normal Maps:
- Incorporate bump and normal maps to simulate fine surface details without adding excessive geometry. These maps can be created in external programs or generated within Blender.
12. Check Mesh Density:
- Evaluate the mesh density in areas where fine details are essential. Adjust the geometry as needed to ensure that there is enough resolution to capture intricate features.
By employing these techniques and considerations, you can effectively analyze and enhance fine details in Blender, resulting in more visually appealing and realistic 3D models. Whether you’re working on character models, architectural details, or intricate objects, paying attention to fine details is key to achieving a high level of realism and quality in your 3D creations.
Simulating Print in Blender
Simulating a 3D print in Blender is a useful step in the 3D printing workflow. This process involves visualizing how your 3D model will be printed layer by layer, helping you identify potential issues before sending the file to the actual 3D printer. Here’s a guide on simulating a print in Blender:
1. Install the 3D Print Toolbox Add-on:
- Blender has a built-in 3D Print Toolbox add-on that provides tools for preparing 3D models for printing. Ensure that this add-on is enabled in Blender by going to “Edit” > “Preferences” > “Add-ons” and searching for “3D Print Toolbox.”
2. Check Model Dimensions:
- Before simulating a print, confirm that your 3D model is correctly scaled and has the desired dimensions. Use the Measure tool to verify distances within the model.
3. Enable Print Toolbox:
- Once the 3D Print Toolbox add-on is enabled, you’ll find a new tab called “3D Print” in the tool shelf. Activate it by selecting the “3D Print” tab.
4. Set Printer Settings:
- In the 3D Print Toolbox panel, set the printer settings according to your 3D printer specifications. This includes parameters such as print bed size, nozzle diameter, and layer height.
5. Check for Non-Manifold Geometry:
- Use the tools provided by the 3D Print Toolbox to check for non-manifold geometry. Non-manifold geometry can cause issues during printing, so it’s crucial to identify and fix these problems.
6. Run Checks:
- The 3D Print Toolbox includes various checks such as face orientation, intersect faces, and more. Run these checks to identify potential problems in your model that could affect the printing process.
7. Use the X-Ray Mode:
- Enable X-Ray mode in Blender to see through your model’s geometry. This can be helpful in identifying any hidden issues or intersections that might not be immediately visible in the default view.
8. Preview Slicing:
- Although Blender itself doesn’t have a built-in slicer, you can use the 3D Print Toolbox to simulate the slicing process. This won’t generate G-code but can help you visualize how the layers will be stacked during printing.
9. Inspect Layer-by-Layer:
- In the 3D Print Toolbox, there is an option to visualize the layers of your model one by one. This feature allows you to inspect the print layer by layer, helping you identify potential issues with overhangs, supports, or intricate details.
10. Adjust Settings as Needed:
- Based on the simulation results, you may need to make adjustments to your model or print settings. This could include refining supports, modifying overhangs, or adjusting print speeds.
11. Save and Export:
- Once you are satisfied with the simulated print, save your Blender file and export your 3D model in a suitable file format (STL, OBJ, etc.) for use with your preferred slicing software.
12. Verify in Slicing Software:
- Open the exported file in your preferred slicing software to perform additional checks and generate the G-code for your 3D printer. Confirm that the slicing results align with your simulated print in Blender.
13. Iterate as Needed:
- If issues are identified during the slicing process, return to Blender to make necessary adjustments. Iterate through this process until you achieve satisfactory slicing results.
Simulating a print in Blender, combined with using dedicated slicing software, helps streamline the 3D printing workflow and ensures that your models are ready for successful printing. Regularly checking and refining your models using simulation tools contribute to improved print quality and a smoother overall printing experience.
Conclusion
Meticulous process of checking for print errors in Blender is a fundamental and indispensable aspect of the 3D printing workflow. By systematically reviewing and addressing potential issues before sending a model to the printer, users can significantly enhance the likelihood of successful prints while saving valuable time and resources.
The comprehensive examination of print errors involves a multi-faceted approach, encompassing the meticulous inspection of the model in both the design and printing stages. From scrutinizing the model’s geometry for non-manifold structures and overlapping faces to assessing the adequacy of support structures and verifying print bed adhesion, each step contributes to the overall reliability and quality of the final 3D print.
The iterative nature of the checking process, coupled with the ability to learn from failed prints, empowers users to refine their modeling and printing techniques continuously. Identifying and rectifying issues such as inadequate layer adhesion, misprints, or structural weaknesses not only ensures the success of the current print but also builds a foundation for more proficient 3D printing practices in future endeavors.
Furthermore, the use of advanced features in Blender, such as the 3D Print Toolbox add-on and simulation tools, allows users to take a proactive approach in identifying potential pitfalls. By incorporating these tools into the workflow, creators gain valuable insights into how the print will unfold layer by layer, enabling them to make informed adjustments and optimizations.
In essence, checking for print errors in Blender is not merely a precautionary step; it is a proactive strategy that empowers users to anticipate and mitigate potential challenges. As 3D printing continues to evolve, this meticulous approach to error checking becomes increasingly crucial in achieving accurate, high-quality prints and pushing the boundaries of what is possible in the realm of digital fabrication.