
Object transformation is a fundamental concept in Blender, a powerful 3D computer graphics software. It plays a crucial role in the creation, manipulation, and animation of objects within the 3D space. The significance of object transformation in Blender can be understood through various aspects:
- Positioning in 3D Space: Object transformation allows users to position objects within the three-dimensional space of the Blender scene. This includes moving an object along the X, Y, or Z axes, enabling precise placement and arrangement of elements in a virtual environment. This is essential for creating realistic scenes or achieving specific artistic compositions.
- Scaling for Proportion and Detail: Scaling is another aspect of object transformation that permits users to adjust the size of objects. Whether it’s scaling up to emphasize a specific element or scaling down for intricate details, this transformation tool is crucial for achieving the desired proportions and level of detail in a 3D model.
- Rotation for Orientation and Animation: Object rotation is vital for changing the orientation of an object. It’s especially significant when animating scenes, as it allows for the smooth and realistic movement of objects. Whether it’s a simple rotation for a static scene or a complex animation sequence, the ability to transform an object’s orientation is a key component in Blender.
- Parenting and Hierarchy: Object transformation is closely tied to parenting and hierarchy in Blender. Objects can be parented to one another, creating a hierarchical relationship. This allows for the transformation of child objects relative to their parent, making it easier to manage complex scenes and animations.
- Keyframing for Animation: Blender’s animation capabilities heavily rely on keyframing, and object transformation is central to this process. Keyframes are set at different points in time, and Blender automatically calculates the object’s transformation between keyframes. This is used to create dynamic animations where objects move, rotate, and scale over time.
- Precision and Numeric Input: Blender provides precise control over object transformations by allowing users to input numerical values for translation, rotation, and scale. This level of precision is crucial for architectural visualization, engineering, and any field where accurate measurements are required.
- Non-destructive Editing: The non-destructive nature of object transformation in Blender is significant. Transformations can be adjusted and fine-tuned at any point in the creative process without permanently altering the original object. This flexibility is valuable for experimentation and iteration during the design and animation phases.
- UV Mapping and Texture Placement: Object transformation also extends to UV mapping, where textures are applied to 3D models. Proper scaling and positioning of UV maps on objects ensure that textures appear correctly and seamlessly. This is crucial for achieving realistic and visually appealing renderings.
Significance of object transformation in Blender lies in its role as a foundational tool for creating, manipulating, and animating 3D objects. It provides the necessary controls for precise positioning, scaling, and rotation, contributing to the overall flexibility and power of Blender as a comprehensive 3D graphics software. Whether used for artistic expression, architectural visualization, or animation production, object transformation is a fundamental aspect of the creative process in Blender.
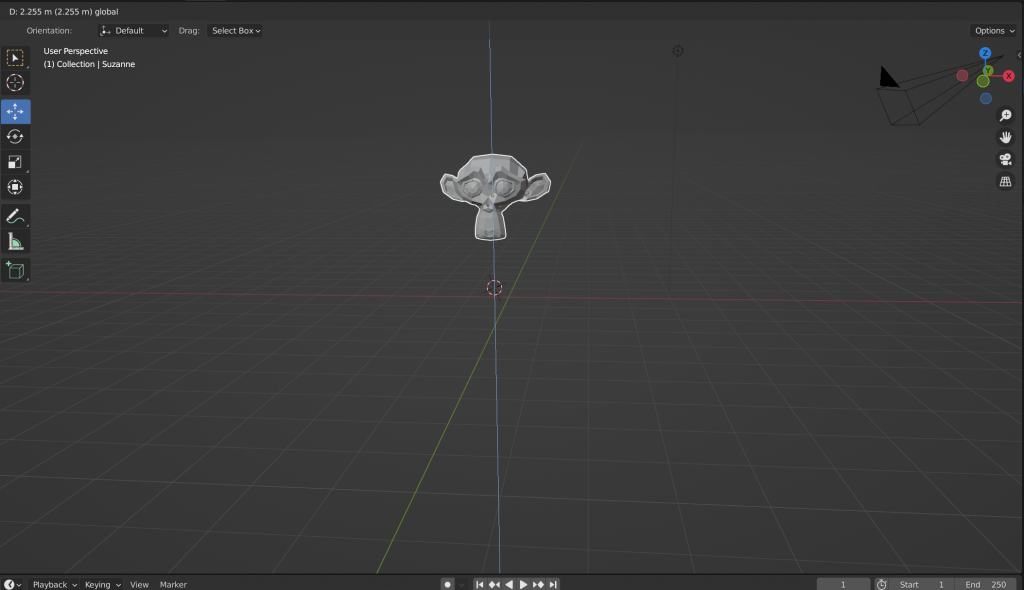
Selecting Objects for Transformation
Selecting objects for transformation is a fundamental step in the 3D modeling and animation process in Blender. The software provides various methods for selecting objects, allowing users to apply transformations like translation, rotation, and scaling to specific elements within a scene. Understanding how to select objects efficiently is crucial for a smooth and productive workflow. Here are different ways to select objects in Blender:
- Left-Click Selection: The most straightforward method is left-clicking on an object in the 3D viewport. This method is intuitive and similar to selection methods in other graphic software. You can select multiple objects by holding down the Shift key while clicking on additional objects.
- Box Selection: Blender offers a box selection tool that allows you to select multiple objects at once. Press the ‘B’ key, and then left-click and drag to create a selection box. Any objects within or partially within the box will be selected.
- Circle Selection: Similar to box selection, Blender provides a circle or lasso selection tool. Press the ‘C’ key to activate circle select, then left-click and drag to draw a circle around the objects you want to select.
- Selecting by Hierarchy: In Blender, objects can be organized in a hierarchical structure through parenting. If you select a parent object, all its children will be selected as well. This is useful for selecting related objects as a group.
- Selecting Linked Objects: Blender allows you to select objects that are linked in some way. For example, in Edit mode for a mesh object, you can select connected vertices, edges, or faces. This is especially useful for selecting parts of a complex model.
- Selecting by Type: Blender allows you to select objects based on their type, such as cameras, lights, meshes, or empties. This can be done using the Outliner or by using the ‘Shift + Alt’ shortcut and right-clicking on an object.
- Inverse Selection: To quickly select everything except the currently selected objects, you can use the ‘Ctrl + I’ shortcut. This is handy when you want to focus on a specific set of objects and manipulate the rest.
- Collection Selection: Blender allows you to organize objects into collections. You can select all objects within a collection by selecting the collection in the Outliner. This is useful for managing complex scenes with many objects.
- Linked Duplicates: Blender has a powerful feature called linked duplicates. If you create a linked duplicate of an object (‘Alt + D’), changes to one instance affect all instances. This is beneficial for maintaining consistency in a scene.
- Filter and Search: In the Outliner, you can use filtering and search functionalities to quickly locate and select specific objects based on their names or other attributes.
Efficient object selection is a key aspect of working seamlessly in Blender. Mastering these selection techniques enables users to precisely control which objects undergo transformations, contributing to a more controlled and streamlined 3D modeling and animation workflow.
Moving Objects in Blender
Moving objects is a fundamental operation in Blender, an essential step in the process of creating 3D scenes and animations. Understanding how to move objects efficiently and precisely is crucial for achieving the desired composition and layout within a 3D space. Here’s an overview of how to move objects in Blender:
- Select the Object: Before moving an object, it must be selected. Left-click on the object in the 3D viewport to select it. To select multiple objects, hold down the Shift key while clicking.
- Translation (G-Key): The primary tool for moving objects in Blender is the translation tool. Press the ‘G’ key to activate the grab or move tool. Once activated, you can move the object by dragging the mouse. The movement is constrained to the view plane by default.
- Axis Constraints: While in grab mode (‘G’ key), you can constrain movement along a specific axis by pressing ‘X,’ ‘Y,’ or ‘Z’ after pressing ‘G.’ For example, ‘GX’ constrains movement to the X-axis. This is useful for precise positioning.
- Snapping: Blender provides snapping options that allow objects to snap to specific points or elements in the scene. You can enable snapping by clicking the magnet icon in the 3D viewport header. This is helpful for aligning objects with precision.
- Numeric Input: For precise movement, you can input numerical values during the translation. Press ‘G’ to activate grab, then press the desired axis key (‘X,’ ‘Y,’ or ‘Z’) and type in the numerical value.
- Proportional Editing: Proportional editing is a powerful feature in Blender that allows you to move not only the selected vertices but also nearby vertices based on a falloff. To enable proportional editing, press the ‘O’ key while in grab mode (‘G’).
- Pivot Points: The pivot point determines the center of rotation and scaling. You can change the pivot point by pressing the period (‘.’) key and choosing a different option, such as “Median Point,” “Individual Origins,” or “3D Cursor.” This affects how the object moves in relation to the pivot.
- Transform Orientation: Blender allows you to change the transform orientation from global to local or custom. This affects the direction in which the object moves. You can switch between these orientations in the top bar of the 3D viewport.
- Parent-Child Relationships: Moving a parent object also affects its children if they are part of the same hierarchy. This can be useful for animating complex scenes or maintaining relationships between objects.
- Animation and Keyframing: Movement in Blender is not limited to static scenes. You can animate object movement over time by setting keyframes. Use the timeline and keyframe animation tools to create dynamic movement sequences.
Understanding these techniques for moving objects in Blender is essential for both beginners and experienced users. Mastery of these tools allows for precise control over object placement, animation, and overall scene composition in the 3D space, contributing to the creation of visually compelling and dynamic 3D projects.
Rotating Objects in Blender
Rotating objects is a fundamental aspect of 3D modeling and animation in Blender. Whether you’re adjusting the orientation of an object for a still scene or animating a dynamic rotation over time, understanding how to rotate objects efficiently is essential. Here’s a guide to rotating objects in Blender:
- Select the Object: Before rotating an object, ensure it’s selected. Left-click on the object in the 3D viewport. To select multiple objects, hold down the Shift key while clicking.
- Rotation (R-Key): The primary tool for rotating objects in Blender is the rotation tool. Press the ‘R’ key to activate the rotation tool. Once activated, you can rotate the object by moving the mouse. The rotation is initially unconstrained.
- Axis Constraints: While in rotation mode (‘R’ key), you can constrain the rotation along a specific axis by pressing ‘X,’ ‘Y,’ or ‘Z’ after pressing ‘R.’ For example, ‘RX’ constrains rotation to the X-axis. This is useful for precise orientation adjustments.
- Numeric Input: For precise rotation, you can input numerical values during the rotation. Press ‘R’ to activate rotation, then press the desired axis key (‘X,’ ‘Y,’ or ‘Z’) and type in the numerical value.
- Snapping: Similar to moving objects, Blender provides snapping options for rotating objects. You can enable snapping by clicking the magnet icon in the 3D viewport header. Snapping can be useful for aligning objects with specific angles or orientations.
- Pivot Points: The pivot point determines the center of rotation. You can change the pivot point by pressing the period (‘.’) key and choosing a different option, such as “Median Point,” “Individual Origins,” or “3D Cursor.” This affects how the object rotates in relation to the pivot.
- Custom Axis Orientation: Blender allows you to set a custom axis orientation for rotation. This is useful when dealing with objects that are not aligned with the global axes. You can define a custom orientation in the Transform Orientation dropdown in the top bar of the 3D viewport.
- Quaternion Rotation: Blender uses quaternions to represent rotations. While this is usually transparent to users, it’s important to understand that rotations in 3D space can be complex. The use of quaternions helps avoid gimbal lock issues.
- Animation and Keyframing: Rotating objects in Blender is not limited to static scenes. You can animate object rotation over time by setting keyframes. Utilize the timeline and keyframe animation tools to create dynamic rotation sequences.
- Parent-Child Relationships: Similar to movement, rotating a parent object also affects its children if they are part of the same hierarchy. Understanding parent-child relationships is crucial for animating complex scenes.
Understanding these techniques for rotating objects in Blender is essential for achieving precise orientation adjustments and creating dynamic animations. Whether you are working on architectural visualization, character animation, or any other 3D project, mastering the rotation tools in Blender enhances your control over object manipulation and contributes to the overall quality of your work.
Scaling Objects in Blender
Scaling objects is a fundamental operation in Blender that allows users to adjust the size of 3D elements within a scene. Precise scaling is crucial for achieving the desired proportions, emphasis, and level of detail in a 3D model. Here’s a guide to scaling objects in Blender:
- Select the Object: Begin by selecting the object you want to scale. Left-click on the object in the 3D viewport. To select multiple objects, hold down the Shift key while clicking.
- Scaling (S-Key): The primary tool for scaling objects in Blender is the scaling tool. Press the ‘S’ key to activate the scale tool. Once activated, you can scale the object by moving the mouse. The scaling is initially unconstrained.
- Axis Constraints: While in scale mode (‘S’ key), you can constrain the scaling along a specific axis by pressing ‘X,’ ‘Y,’ or ‘Z’ after pressing ‘S.’ For example, ‘SX’ constrains scaling to the X-axis. This is useful for maintaining proportionality in specific directions.
- Numeric Input: For precise scaling, you can input numerical values during the scaling operation. Press ‘S’ to activate scaling, then press the desired axis key (‘X,’ ‘Y,’ or ‘Z’) and type in the numerical value.
- Snapping: Blender provides snapping options for scaling objects. You can enable snapping by clicking the magnet icon in the 3D viewport header. Snapping can be useful for aligning objects with specific dimensions or for creating precise arrangements.
- Pivot Points: The pivot point determines the center of scaling. You can change the pivot point by pressing the period (‘.’) key and choosing a different option, such as “Median Point,” “Individual Origins,” or “3D Cursor.” This affects how the object scales in relation to the pivot.
- Proportional Editing: Proportional editing allows you to scale not only the selected vertices but also nearby vertices based on a falloff. To enable proportional editing, press the ‘O’ key while in scale mode (‘S’).
- Custom Axis Orientation: Similar to rotation, Blender allows you to set a custom axis orientation for scaling. This is useful when dealing with objects that are not aligned with the global axes. You can define a custom orientation in the Transform Orientation dropdown in the top bar of the 3D viewport.
- Animation and Keyframing: Scaling objects in Blender is not limited to static scenes. You can animate object scaling over time by setting keyframes. Use the timeline and keyframe animation tools to create dynamic scaling sequences.
- Parent-Child Relationships: Scaling a parent object also affects its children if they are part of the same hierarchy. Understanding parent-child relationships is crucial for animating complex scenes and maintaining consistency in the scale of related objects.
Understanding these techniques for scaling objects in Blender is essential for achieving precise size adjustments, maintaining proportionality, and creating dynamic animations. Whether you are working on architectural visualization, product design, or any other 3D project, mastering the scaling tools in Blender enhances your control over object manipulation and contributes to the overall quality of your work.
Conclusion
Transformative capabilities of moving, rotating, and scaling objects in Blender form the cornerstone of the software’s versatility and power in 3D modeling and animation. The ability to precisely control the position, orientation, and size of objects within a 3D space is essential for artists, designers, and animators working on a wide range of projects.
Blender’s intuitive interface provides various tools and methods for object transformation, catering to both beginners and experienced users. Whether it’s the basic yet fundamental translation, rotation, and scaling tools activated with simple key presses, or the more advanced features like proportional editing, custom axis orientation, and animation through keyframing, Blender offers a comprehensive suite of tools to meet the diverse needs of its users.
Understanding how to manipulate objects in Blender is not merely about static scene composition; it extends to the dynamic realm of animation. Keyframing allows artists to breathe life into their creations, enabling objects to move, rotate, and scale over time. The precise control offered by Blender’s transformation tools, coupled with features like pivot points, axis constraints, and hierarchical relationships, empowers users to craft intricate and realistic animations.
Moreover, the non-destructive nature of object transformation in Blender encourages experimentation and iteration during the creative process. Artists can make adjustments at any point without permanently altering the original object, fostering a flexible and dynamic workflow.
Whether working on architectural visualizations, character animations, or any other 3D project, mastering the art of transforming objects in Blender is a key skill. It not only ensures technical proficiency but also opens the door to limitless creative possibilities, allowing users to bring their imaginative visions to life in the virtual 3D space. In essence, object transformation in Blender is more than a set of tools; it’s a gateway to turning creative ideas into visually stunning and dynamic realities.