
To display player health in numbers in a GUI in Roblox Studio, you can use a combination of a LocalScript and a ScreenGui. Here’s a basic example:
- Create a ScreenGui:
- Insert a
ScreenGuiobject intoStarterGui.
- Insert a
- Create a TextLabel:
- Inside the
ScreenGui, insert aTextLabel. This will be used to display the player’s health. Rename ScreenGui to “HealthGui” and TextLabel to “HealthLabel”.
- Inside the
- Write a LocalScript:
- Insert a
LocalScriptintoStarterPlayer > StarterPlayerScripts. - Use the following script:
- Insert a
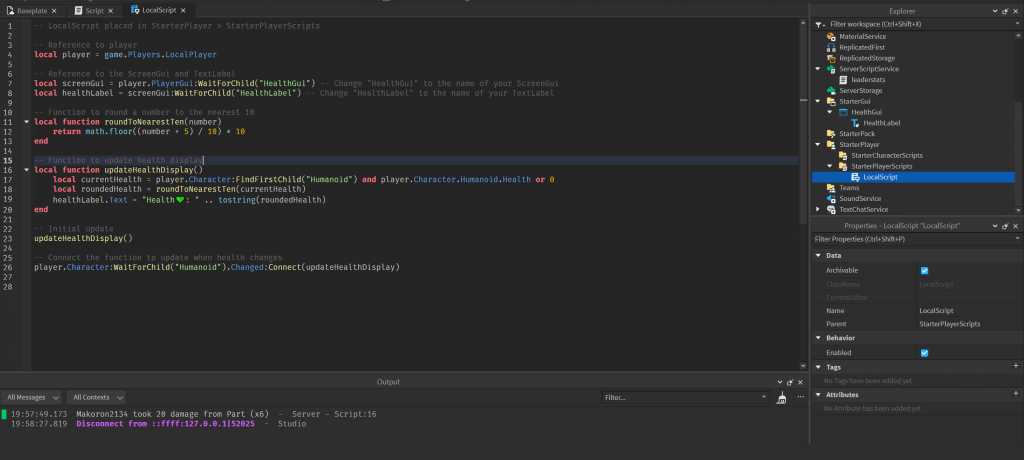
-- LocalScript placed in StarterPlayer > StarterPlayerScripts

-- Reference to player
local player = game.Players.LocalPlayer

-- Reference to the ScreenGui and TextLabel
local screenGui = player.PlayerGui:WaitForChild("HealthGui") -- Change "HealthGui" to the name of your ScreenGui
local healthLabel = screenGui:WaitForChild("HealthLabel") -- Change "HealthLabel" to the name of your TextLabel

-- Function to round a number to the nearest 10
local function roundToNearestTen(number)
	return math.floor((number + 5) / 10) * 10
end

-- Function to update health display
local function updateHealthDisplay()
	local currentHealth = player.Character:FindFirstChild("Humanoid") and player.Character.Humanoid.Health or 0
	local roundedHealth = roundToNearestTen(currentHealth)
	healthLabel.Text = "Health💚: " .. tostring(roundedHealth)
end

-- Initial update
updateHealthDisplay()

-- Connect the function to update when health changes
player.Character:WaitForChild("Humanoid").Changed:Connect(updateHealthDisplay)
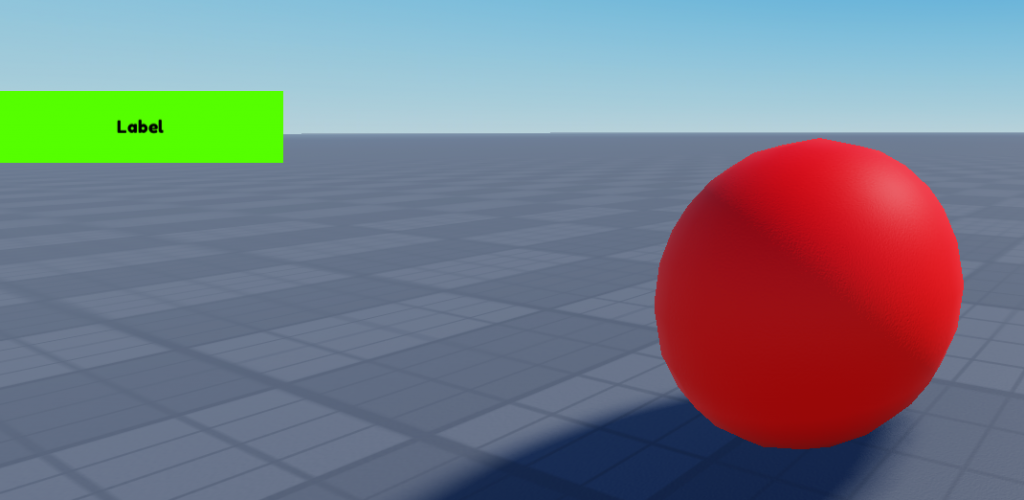
Now, when a player’s health changes, the TextLabel in the GUI will automatically update to display the player’s current health. Adjust the GUI design and script as necessary for your game.
Script explanation
Reference to Player:
local player = game.Players.LocalPlayer
This line creates a variable player that refers to the LocalPlayer, i.e., the player currently playing the game.
Reference to ScreenGui and TextLabel:
local screenGui = player.PlayerGui:WaitForChild("HealthGui")
local healthLabel = screenGui:WaitForChild("HealthLabel")
These lines create references to a ScreenGui and a TextLabel within that ScreenGui. The WaitForChild method is used to make sure the script waits until these objects are actually created.
Function to Round to Nearest Ten:
local function roundToNearestTen(number)
    return math.floor((number + 5) / 10) * 10
end
This function, roundToNearestTen, takes a number as input and rounds it to the nearest multiple of 10 using mathematical operations.
Function to Update Health Display:
local function updateHealthDisplay()
    local currentHealth = player.Character:FindFirstChild("Humanoid") and player.Character.Humanoid.Health or 0
    local roundedHealth = roundToNearestTen(currentHealth)
    healthLabel.Text = "Health💚: " .. tostring(roundedHealth)
end
This function, updateHealthDisplay, retrieves the player’s current health. It then rounds that value to the nearest multiple of 10 using the previously defined function roundToNearestTen. The rounded health value is then displayed on the TextLabel.
Initial Update:
updateHealthDisplay()
This line calls the updateHealthDisplay function initially to set up the health display.
Connect Function to Update when Health Changes:
player.Character:WaitForChild("Humanoid").Changed:Connect(updateHealthDisplay)
This line sets up a connection so that the updateHealthDisplay function is called whenever the player’s character’s humanoid’s (presumably representing health) Changed event is fired. This ensures that the health display is updated dynamically as the player’s health changes.
Part script for dealing damage
local part = script.Parent: This line creates a local variablepartand assigns it the value of the script’s parent, which is assumed to be a part (e.g., a brick or mesh) in the game world.local damageAmount = 20: This line sets a local variabledamageAmountto 20, indicating the amount of damage the part will deal when touched.local debounceTime = 2: This line sets a local variabledebounceTimeto 2 seconds, which represents the cooldown time after the part is touched before it can deal damage again.local debounce = false: This line initializes a local variabledebounceand sets it to false. This variable will be used to track whether the part is on cooldown.local function onTouch(hit): This line defines a local function namedonTouch, which takes an argumenthit. This function will be called when the part is touched by another object in the game.- Inside the
onTouchfunction:local character = hit.Parent: This line gets the parent of the object that touched the part, assuming it’s a character model.local humanoid = character:FindFirstChildOfClass("Humanoid"): This line attempts to find the first child of the character that is a “Humanoid” instance. This is typically used to identify player characters.if humanoid and not debounce then: This conditional checks if the touched object is a player character (having a Humanoid) and if the part is not on cooldown.humanoid:TakeDamage(damageAmount): If the conditions are met, this line deals damage to the player by calling theTakeDamagemethod on the Humanoid instance.print(character.Name .. " took " .. damageAmount .. " damage from " .. part.Name): This line prints a message to the console, indicating which player took damage from the specific part.debounce = true: This line sets thedebouncevariable to true, indicating that the part is now on cooldown.wait(debounceTime): This line makes the script pause execution for the specified cooldown time (debounceTime).debounce = false: After the cooldown period, this line resets thedebouncevariable to false, allowing the part to deal damage again.
part.Touched:Connect(onTouch): This line connects theonTouchfunction to theTouchedevent of thepart, meaning that when the part is touched, theonTouchfunction will be called.
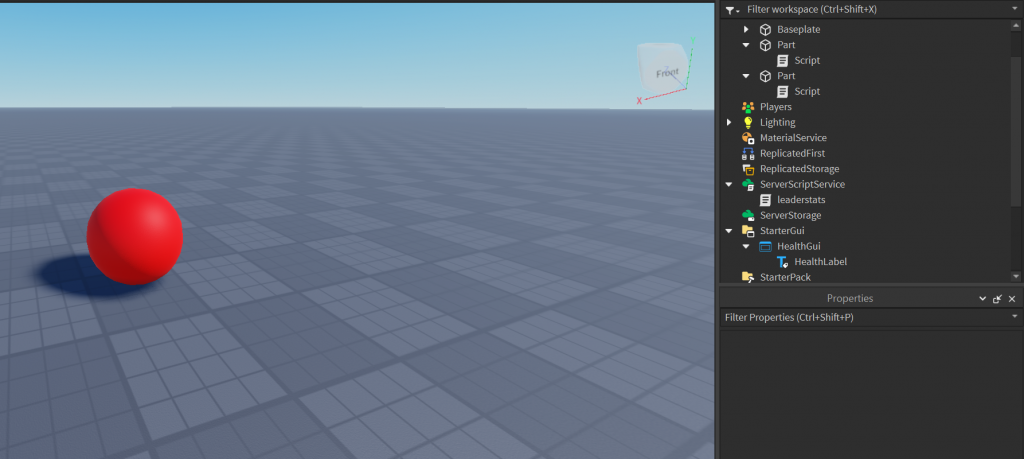
Full Part Script (Attach to any part in the game)
local part = script.Parent -- Reference to the part
local damageAmount = 20 -- Set the amount of damage the part will deal
local debounceTime = 2 -- Set the cooldown time in seconds

local debounce = false -- Variable to track if the part is on cooldown

-- Function to handle touch events
local function onTouch(hit)
	local character = hit.Parent
	local humanoid = character:FindFirstChildOfClass("Humanoid")

	-- Check if the touched object is a player with a Humanoid and debounce is not active
	if humanoid and not debounce then
		-- Deal damage to the player
		humanoid:TakeDamage(damageAmount)
		print(character.Name .. " took " .. damageAmount .. " damage from " .. part.Name)

		-- Set debounce to true and start cooldown
		debounce = true
		wait(debounceTime)
		debounce = false
	end
end

-- Connect the onTouch function to the Touched event
part.Touched:Connect(onTouch)
Text Label Customization
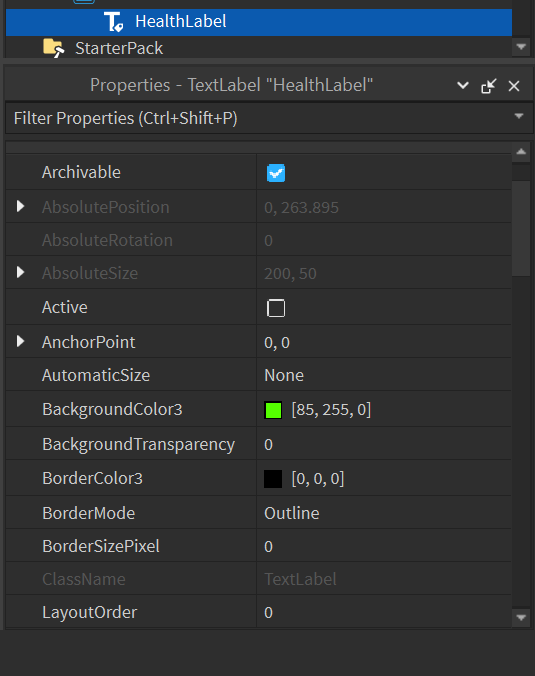
In Roblox Studio, customizing a GUI TextLabel involves adjusting various properties in the Properties window. The Properties window allows you to modify the appearance and behavior of different elements in your game, including TextLabels. To change the font or color of a GUI TextLabel, follow these steps:
- Select the TextLabel: Click on the TextLabel you want to customize. This will allow you to view and edit its properties in the Properties window.
- Access the Properties Window: If the Properties window is not already open, you can open it by going to the “View” tab and selecting “Properties” from the dropdown menu. Alternatively, you can press
F4on your keyboard. - Customize Font:
- Look for the property named “Font” in the Properties window.
- Click on the dropdown menu next to “Font” to see the available font options.
- Select the desired font from the list. Common choices include “Arial,” “Gotham,” “SourceSans,” and others.
- Customize Text Color:
- Locate the property named “TextColor3” in the Properties window.
- Click on the color box next to “TextColor3” to open the color picker.
- Choose the desired color using the color picker or enter RGB values manually.
- Customize Text Stroke Color (Optional):
- If you want to add a stroke (outline) around the text, locate the property named “TextStrokeColor3” in the Properties window.
- Click on the color box next to “TextStrokeColor3” and choose the desired stroke color.
- Adjust Text Stroke Transparency (Optional):
- If you added a stroke and want to adjust its transparency, find the property named “TextStrokeTransparency” in the Properties window.
- Enter a value between 0 (fully opaque) and 1 (fully transparent) to control the stroke’s transparency.
- Preview Changes:
- As you make changes, you can preview them in the workspace to see how they affect the appearance of the TextLabel.
Conclusion
provided script offers a functional implementation for saving and loading player data into Leaderstats in a Roblox game. Here are some key points summarizing the script:
- Initialization and Structure:
- The script initializes the player’s Leaderstats by creating a folder named “leaderstats” and two local variables,
playerHealthandplayerScore. - The
saveDataToLeaderstatsfunction sets default values forplayerHealthandplayerScoreand establishes connections to update the player’s attributes whenever these values change.
- The script initializes the player’s Leaderstats by creating a folder named “leaderstats” and two local variables,
- Data Saving and Loading:
- The script utilizes the player’s attributes to save and retrieve data persistently. This ensures that the player’s progress in terms of health and score is maintained across different sessions.
- The
loadDataFromLeaderstatsfunction checks for the existence of the necessary variables and loads the saved values into the local variables during a player’s initialization.
- Event Handling:
- The script connects functions to player events (
PlayerAddedandPlayerRemoving) to ensure that data is saved when a player joins the game and cleared when a player leaves.
- The script connects functions to player events (
- Flexibility and Adaptability:
- The script provides a foundation that can be adapted to accommodate additional player data or modified based on specific game requirements.
- Developers can easily extend the script to include more variables in Leaderstats or implement additional functionality for handling player data.
- Player Data Integrity and Security:
- By using the player’s attributes and handling data on the server side, the script enhances the security and integrity of player data, mitigating the risk of exploitation or cheating.
In summary, this script serves as a practical template for managing player data in Roblox games, ensuring persistence, security, and ease of use. Developers can further customize and expand upon this foundation to create a robust system tailored to their game’s unique features and requirements.