
Roblox Studio provides a powerful and immersive platform for creating and developing games on the Roblox platform. The user interface (UI) of Roblox Studio is designed to provide developers with a comprehensive set of tools and features to bring their ideas to life.
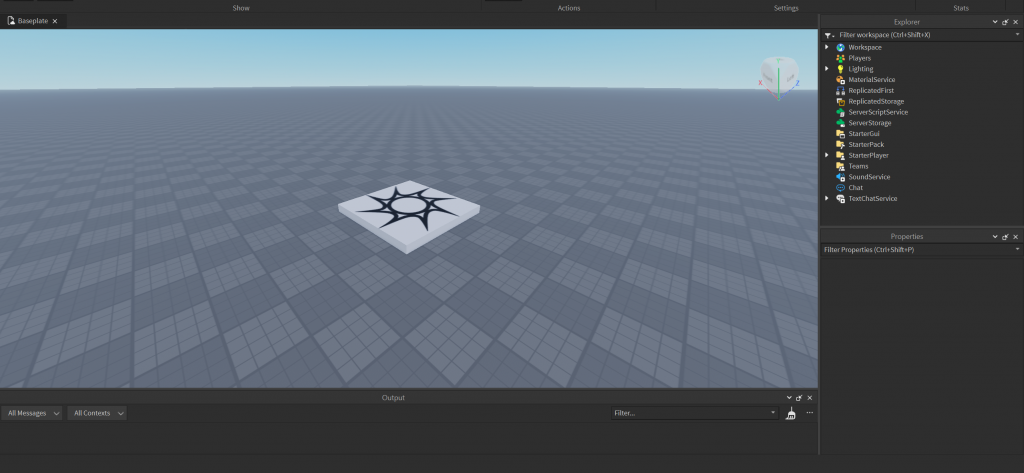
When you open Roblox Studio, you’ll be greeted with a workspace that consists of several key components. The main window contains various panels, including the Explorer, Properties, Toolbox, and Output. The Explorer panel allows you to view and navigate the hierarchy of objects in your game. The Properties panel displays the properties of the selected object, allowing you to modify and customize its attributes. The Toolbox provides access to a wide range of assets, scripts, and plugins that you can use in your game development process. The Output panel shows messages, errors, and warnings related to your game’s execution.
The toolbar at the top of the interface contains essential commands such as saving, undo/redo, playtesting, and publishing options. The menu bar offers additional functionality and settings, including preferences, project settings, and collaboration features.
To build your game, you can drag and drop objects from the Toolbox into the workspace, manipulate them using the various tools, and write scripts to add interactivity and gameplay mechanics. The UI also supports features like terrain editing, lighting adjustments, and particle effects to create immersive environments.
As you explore the Roblox Studio UI, you’ll discover a wide range of features, tools, and customization options that allow you to bring your creative vision to fruition. It’s important to familiarize yourself with the UI elements, experiment with different workflows, and make use of the extensive documentation and community resources available to maximize your game development experience.
In conclusion, the Roblox Studio user interface serves as a comprehensive workspace for game developers, providing intuitive access to tools, assets, and scripting capabilities. With a little practice and exploration, you can leverage the Roblox Studio UI to create exciting and immersive games on the Roblox platform.
Basic UI Components
Roblox Studio offers a robust user interface (UI) that provides developers with a range of components to create and customize games on the Roblox platform. These UI components help streamline the development process and offer a seamless experience. Here are some key components of the Roblox Studio UI:
- Main Workspace: The central area where you design and build your game. It allows you to place and manipulate objects, terrain, and other elements.
- Explorer: This panel provides a hierarchical view of all the objects in your game. You can organize, select, and navigate through the various components, including models, scripts, and parts.
- Properties: The Properties panel displays the attributes and settings of the selected object. Here, you can modify properties such as size, position, color, and behavior. It also allows you to add custom scripts to objects.
- Toolbox: The Toolbox contains a vast collection of assets, models, scripts, and plugins that you can use to enhance your game. It provides a searchable library of resources and enables easy drag-and-drop functionality to add elements to your game.
- Output: The Output panel shows runtime messages, errors, and warnings related to your game’s execution. It is helpful for debugging and troubleshooting issues in your scripts or game logic.
- Command Bar: The Command Bar allows you to execute Lua commands directly within Roblox Studio. It provides a quick way to test and run code snippets, perform administrative tasks, and access various functions.
- Toolbar: The Toolbar offers quick access to commonly used commands and functions such as saving, undo/redo, playtesting, and publishing options. It provides shortcuts to streamline your workflow.
- Menu Bar: The Menu Bar contains additional options and settings for Roblox Studio. It offers various menus, including File, Edit, View, Plugins, and Help, where you can access project settings, preferences, collaboration tools, and documentation.
- Viewport: The Viewport displays a live preview of your game or scene. It allows you to navigate, pan, and zoom within your game environment, giving you a real-time visual representation of how your game will look and function.
These UI components work together to provide a comprehensive and intuitive workspace for developing games in Roblox Studio. By leveraging these components, developers can create, modify, and iterate on their games, bringing their visions to life on the Roblox platform.
Roblox studio Explorer Panel – Management center of your game
In Roblox Studio’s Explorer panel, objects are categorized into different groups based on their functionality and purpose. These categories help developers organize and manage the various components of their games more efficiently. Here are some common categories found in the Roblox Studio Explorer:
- Workspace: This category contains objects that make up the game’s main environment, including the baseplate, terrain, and other structural elements. Developers can manipulate and customize these objects to create the game’s world.
- Models: Models are pre-built collections of objects grouped together. They can be used to create complex structures or reusable components within a game. Models often consist of multiple parts, scripts, and other related objects.
- Parts: Parts are individual objects that make up the game’s physical world. They can be customized with properties such as size, position, shape, and material. Parts serve as the building blocks for constructing environments, platforms, characters, and other interactive elements.
- Scripts: Scripts are objects that contain custom code written in Lua, Roblox’s programming language. They add interactivity, logic, and behavior to the game. Scripts can be associated with various objects to control their actions, animations, and interactions with players.
- Audio: This category includes objects related to sound and music in the game. It consists of audio assets, sound effects, background music, and other audio-related components.
- Decals: Decals are 2D images or textures that can be applied to surfaces in the game. They are commonly used for adding visual details, textures, logos, or signage to objects and environments.
- Animations: The Animations category contains objects that define character movements, gestures, and actions. These objects are typically associated with humanoid characters and control their animations and poses.
- UI: UI (User Interface) objects are used to create graphical elements that allow players to interact with the game. This category includes buttons, text labels, text boxes, and other user interface components.
- Lights: Lights are objects that control the illumination and lighting effects within the game. They can be adjusted to create different moods, ambiance, and visual effects.
- Cameras: Cameras determine the player’s perspective and viewpoint in the game. They control the field of view, angles, and other camera settings to provide different perspectives for gameplay or cinematic sequences.
These categories in the Roblox Studio Explorer panel help developers organize and manage the objects within their games, making it easier to locate, modify, and control different components. By leveraging these categories, developers can maintain a structured and efficient workflow while creating immersive and engaging experiences in Roblox.
Roblox Studio Explorer Elements
In Roblox Studio’s Explorer panel, you’ll come across various essential elements that contribute to the development and functionality of Roblox games. Let’s explore some key elements found in the Roblox Studio Explorer:
- Workspace: Workspace represents the virtual environment of your game. It contains objects such as parts, models, and terrain that make up the playable world. Developers can add, manipulate, and customize objects within the Workspace, creating the game’s interactive elements and structures.
- Camera: The Camera element determines the player’s perspective and viewpoint within the game. It controls the field of view, angles, and other camera settings to provide different viewpoints for gameplay or cinematic sequences.
- Lighting: The Lighting element manages the illumination and lighting effects within the game. Developers can adjust parameters like ambient light, shadows, and colors to create specific moods, ambiance, and visual effects.
- Players: The Players element represents the collection of players in the game. It allows developers to access and manage player-related information, such as their character models, positions, and interactions.
- ReplicatedFirst: ReplicatedFirst contains objects that are replicated to the client before any other replication occurs. This allows essential assets and scripts to be available immediately when a player joins the game.
- ReplicatedStorage: ReplicatedStorage is a container for objects and scripts that need to be accessed by both the client and the server. It holds assets, shared scripts, GUI templates, and other resources that are available to all players in the game.
- ServerStorage: ServerStorage is a container for server-side assets and scripts that are not required by the client. It allows developers to store objects and scripts that are specific to server operations, such as data management and server-side logic.
- StarterGui: StarterGui holds GUI (Graphical User Interface) elements that are displayed to players when they join the game. Developers can use StarterGui to create and customize the user interface for the game, including menus, buttons, and HUDs.
- StarterPack: StarterPack contains objects that are given to players when they join the game for the first time. It typically includes items, tools, or other initial resources that players can use to start their gameplay.
- StarterPlayer: StarterPlayer holds settings and configurations for new players joining the game. It allows developers to define properties such as default character appearance, movement speed, and other initial player settings.
- StarterCharacterScripts: StarterCharacterScripts contains scripts that are automatically run when a player’s character is created. Developers can use these scripts to define character behaviors, animations, and other actions.
- StarterPlayerScripts: StarterPlayerScripts holds scripts that are automatically run when a player joins the game. These scripts can be used to implement game mechanics, manage player interactions, and handle various game events.
- Teams: Teams element represents the different teams within the game. Developers can create and manage teams, assign players to specific teams, and implement team-based gameplay mechanics.
- SoundService: SoundService provides functionality for managing audio within the game. Developers can use SoundService to play music, sound effects, and other audio elements in the game.
- LocalizationService: LocalizationService allows developers to localize their games by providing translations for different languages. It enables the game to adapt and display content in a language that matches the player’s preference.
- TestService: TestService provides tools and functionality for testing and debugging games within Roblox Studio. It allows developers to simulate gameplay scenarios, debug scripts, and analyze game performance.