
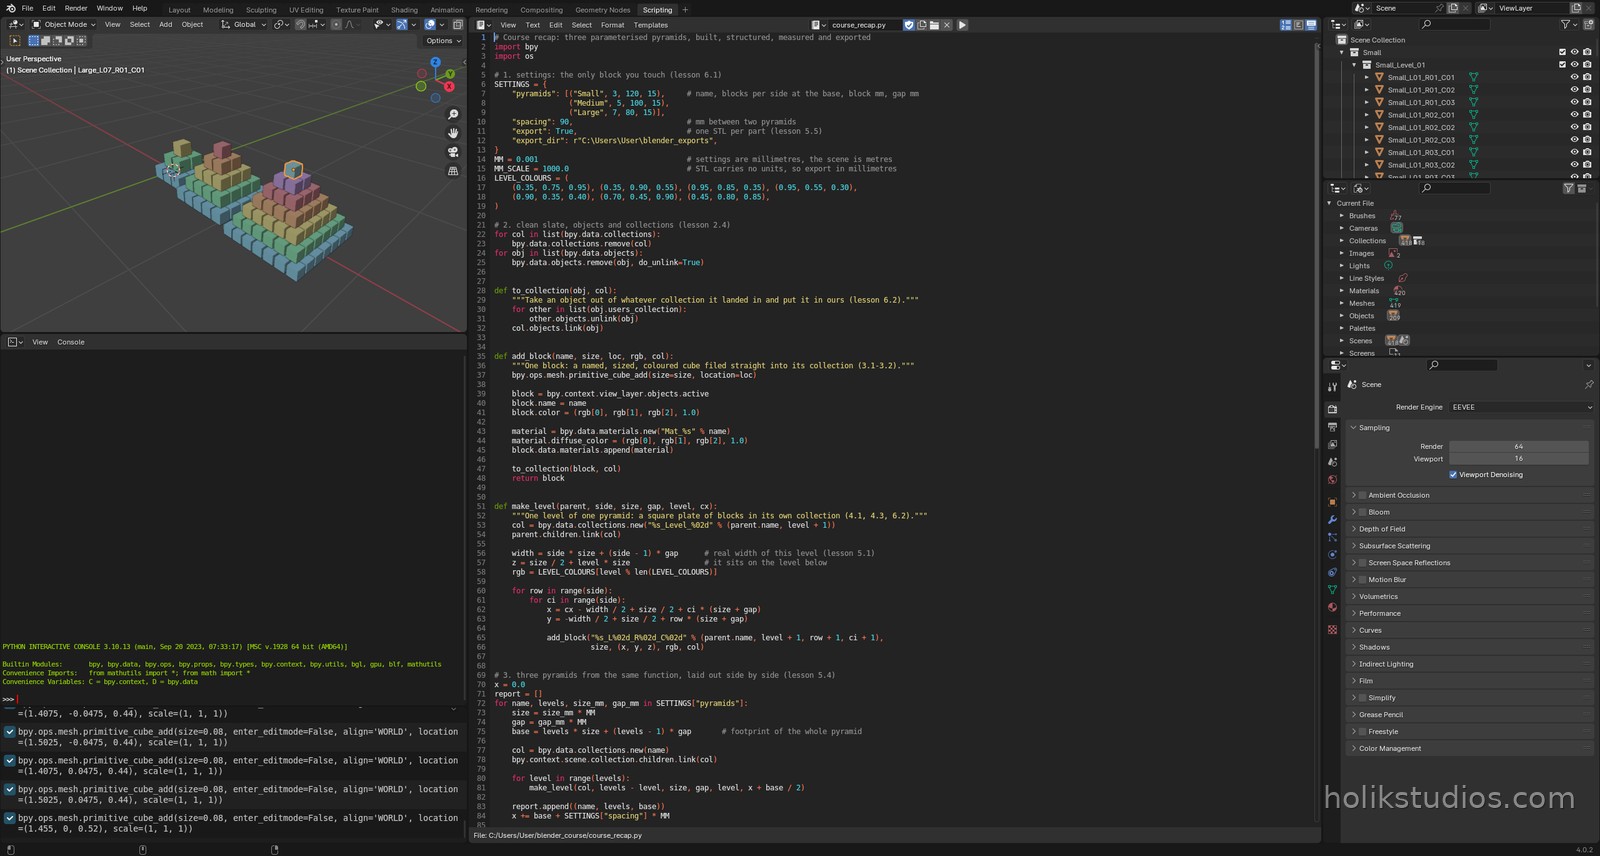
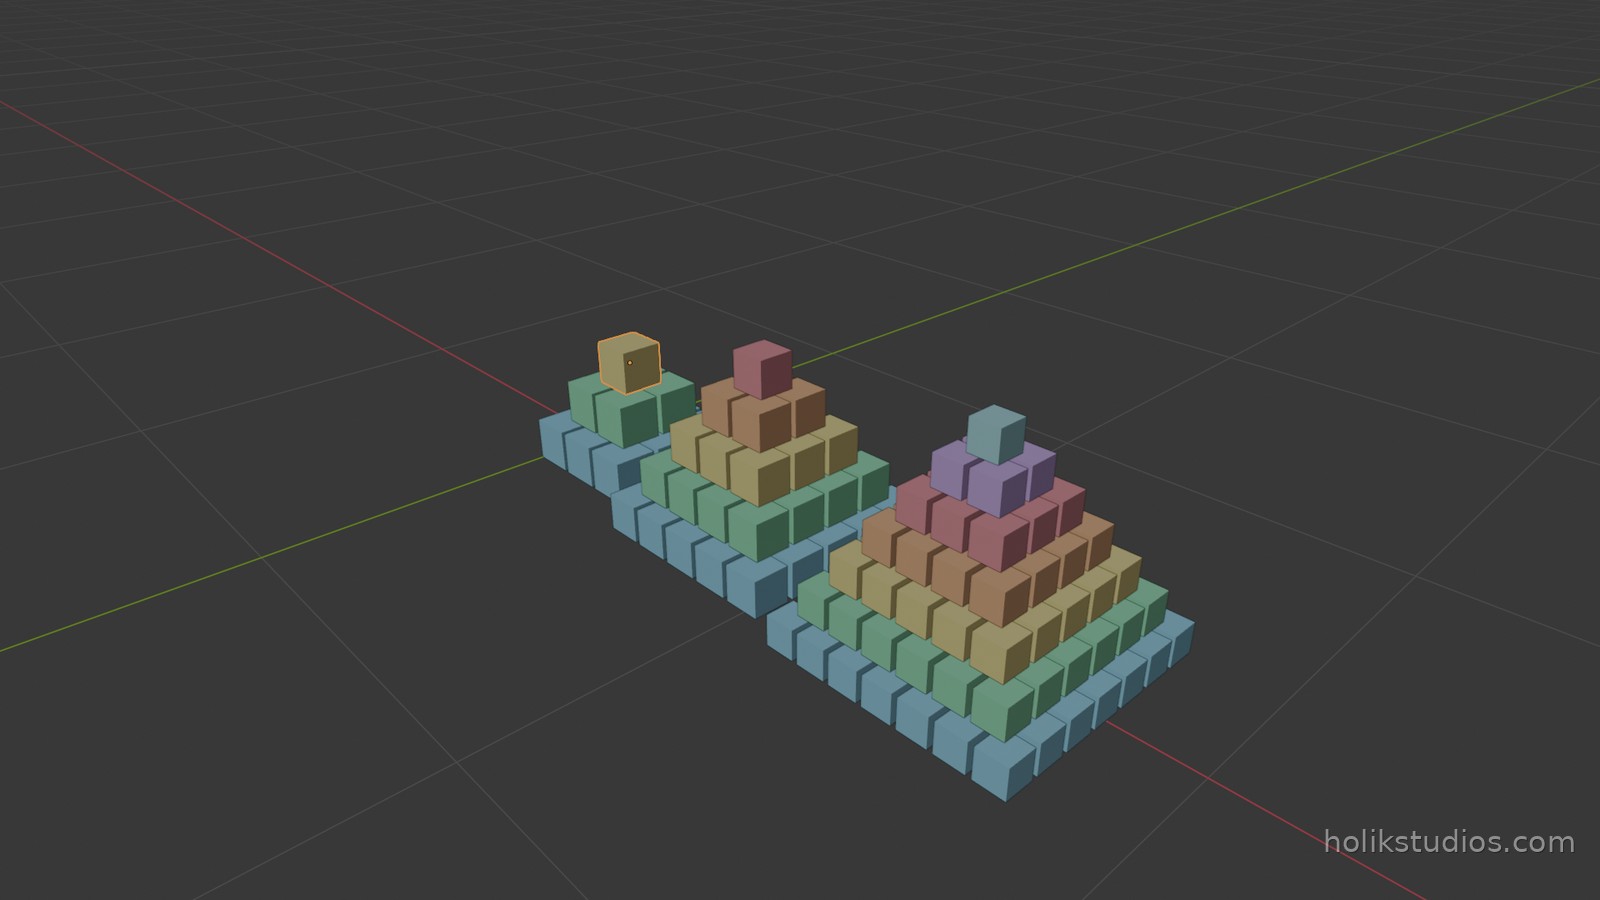
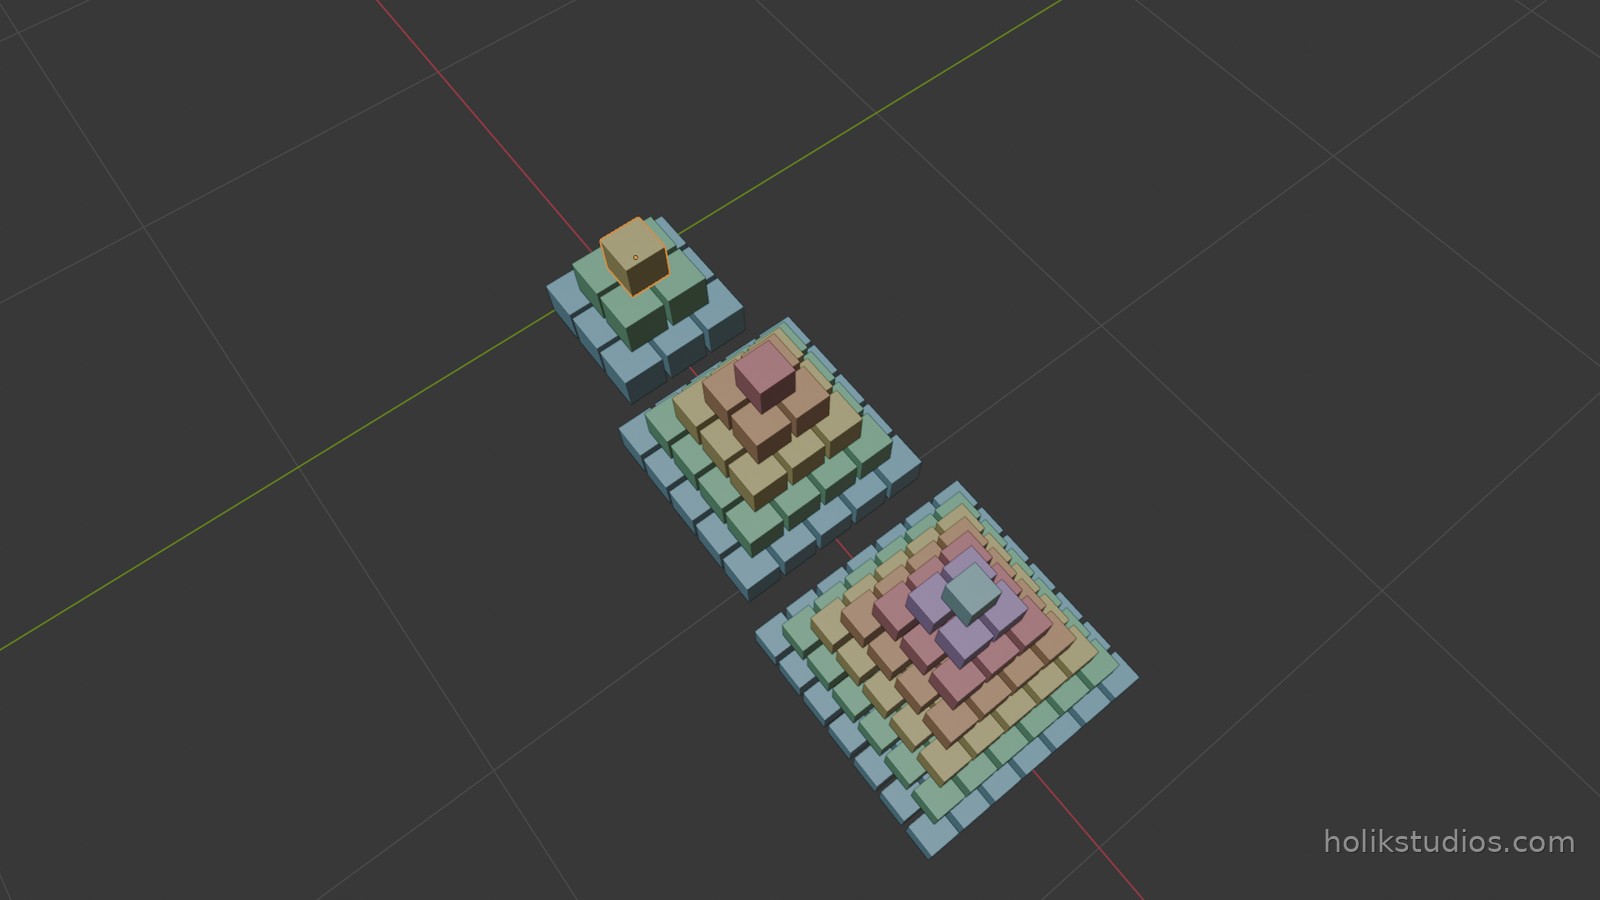
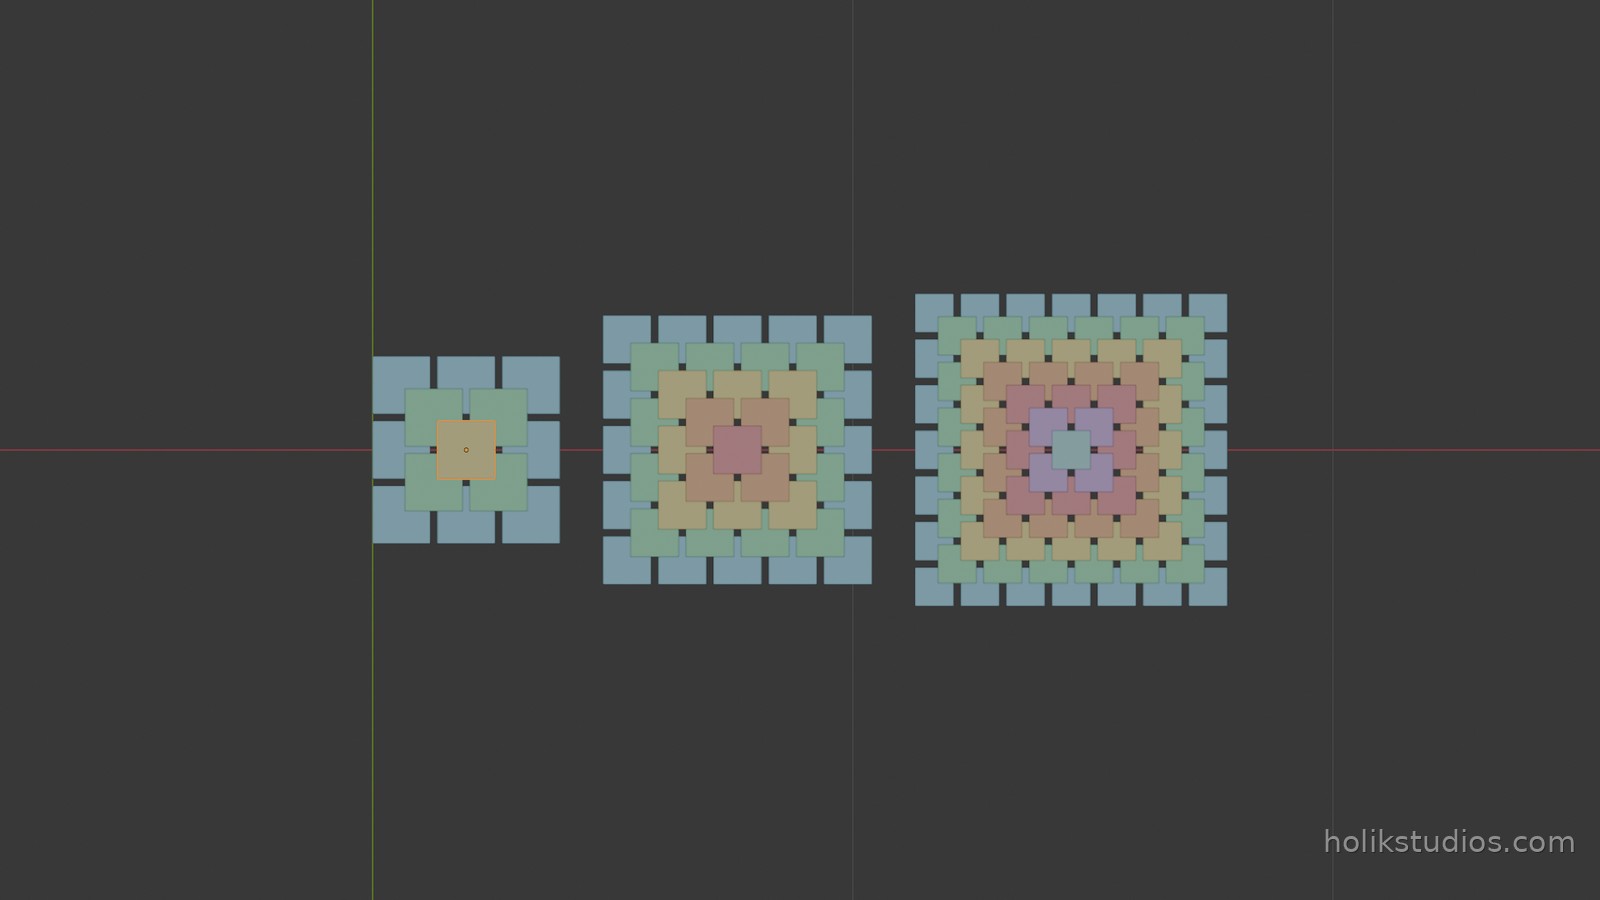
The finale is the whole course in one job: three pyramids, small, medium and large, built from a single parameterised function, laid out next to each other, sorted into collections, exported as one file per part, and measured by the script itself. The only difference between the three pyramids is three rows of numbers.
Step 1: settings, and a clean scene
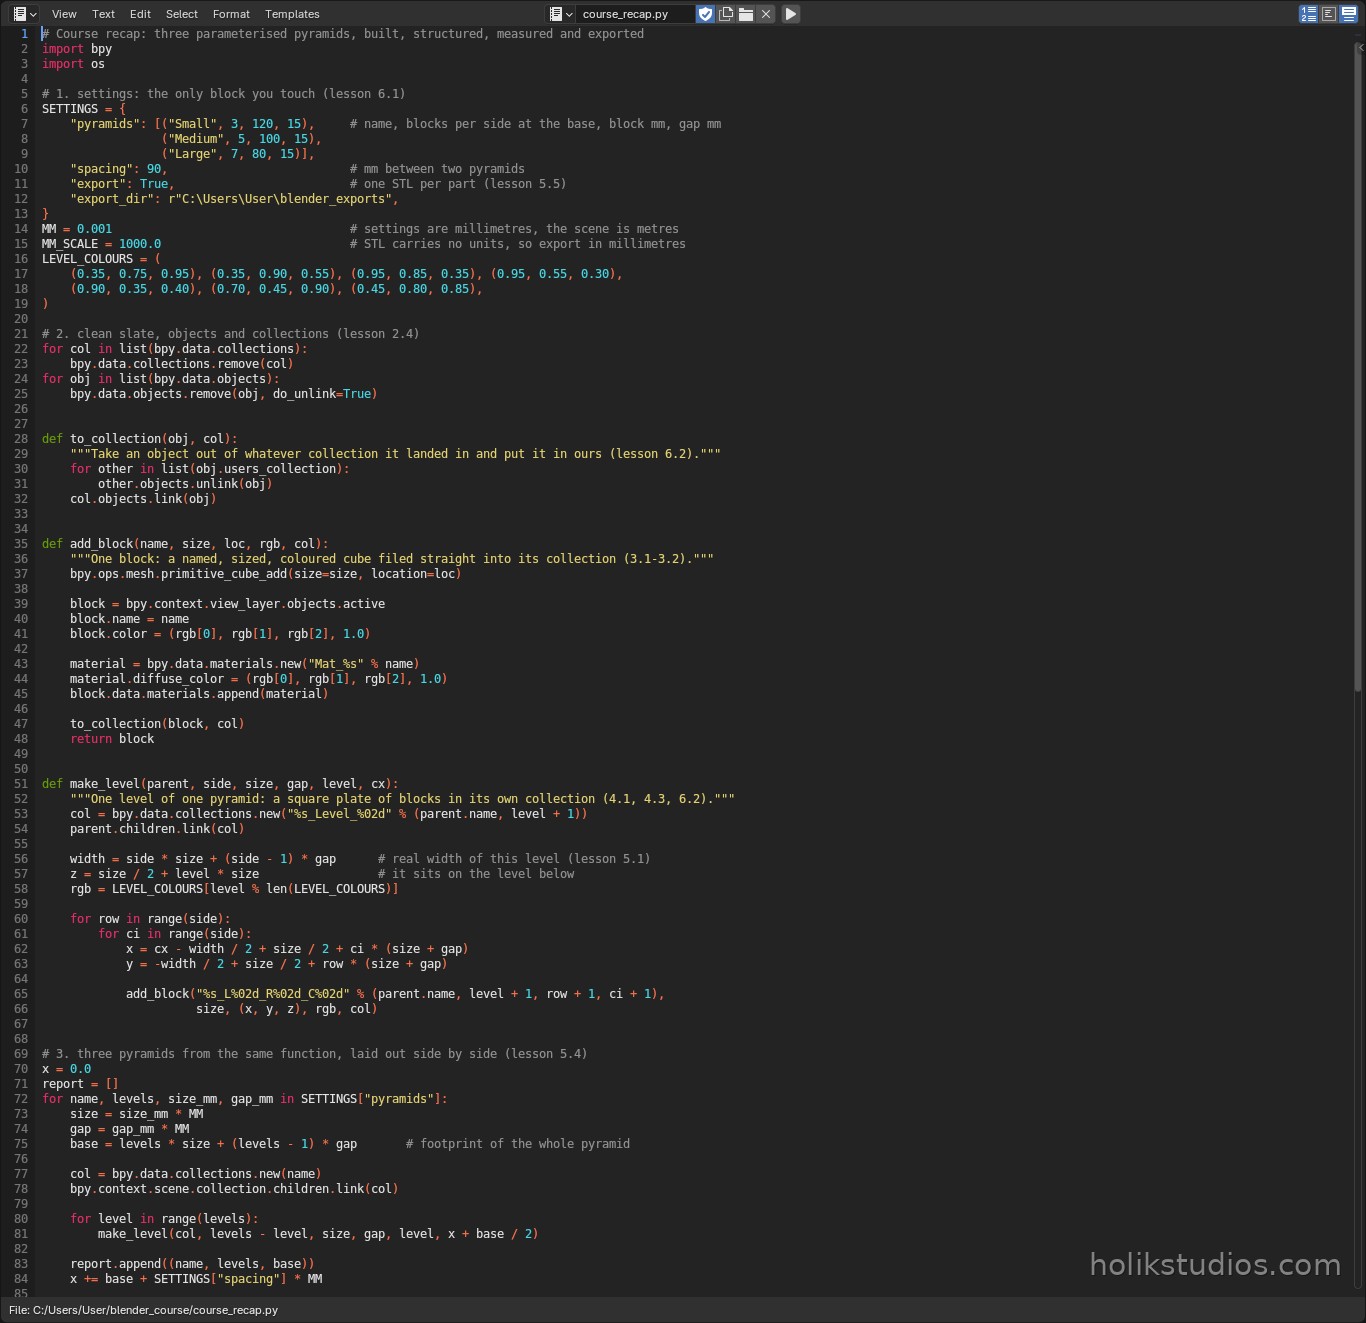
Everything starts with the block you actually edit. Millimetres in, because that is what a client or a supplier speaks, and one line converting to the metres Blender works in. Nothing else in the file contains a decision.
settings
SETTINGS = {
    "pyramids": [("Small", 3, 120, 15),     # name, blocks per side at the base, block mm, gap mm
                 ("Medium", 5, 100, 15),
                 ("Large", 7, 80, 15)],
    "spacing": 90,                          # mm between two pyramids
    "export": True,                         # one STL per part (lesson 5.5)
    "export_dir": r"C:\Users\User\blender_exports",
}
MM = 0.001                                  # settings are millimetres, the scene is metres
Then the script clears the file: old objects first (2.4 Clearing the Scene in One Line), and old collections too, because a repeatable build cannot inherit yesterday’s leftovers.
clean slate
for col in list(bpy.data.collections):
    bpy.data.collections.remove(col)
for obj in list(bpy.data.objects):
    bpy.data.objects.remove(obj, do_unlink=True)
Step 2: one function builds any level
A pyramid is levels of blocks, and a level is a loop over rows and columns, the same pattern as the rows and grids lesson (4.3 Rows, Grids and Even Spacing, 4.1 Your First Loop). What makes it parameterised is that nothing inside is a fixed number: the level gets its side count, its block size and its gap from the outside, so one function builds the 3 by 3 base of a small pyramid and the 7 by 7 base of a large one.
make_level()
def make_level(parent, side, size, gap, level, cx):
    """One level of one pyramid: a square plate of blocks in its own collection (4.1, 4.3, 6.2)."""
    col = bpy.data.collections.new("%s_Level_%02d" % (parent.name, level + 1))
    parent.children.link(col)

    width = side * size + (side - 1) * gap      # real width of this level (lesson 5.1)
    z = size / 2 + level * size                 # it sits on the level below
    rgb = LEVEL_COLOURS[level % len(LEVEL_COLOURS)]

    for row in range(side):
        for ci in range(side):
            x = cx - width / 2 + size / 2 + ci * (size + gap)
            y = -width / 2 + size / 2 + row * (size + gap)

            add_block("%s_L%02d_R%02d_C%02d" % (parent.name, level + 1, row + 1, ci + 1),
                      size, (x, y, z), rgb, col)
Each level also creates its own collection and files its blocks into it, which is the structure habit from 6.2 Cleanup and Structure. The blocks are primitives with real dimensions and names, as in 3.1 Creating Primitives and 3.2 Naming and Organizing Objects. A block is called Large_L07_R03_C05: the pyramid, the level, the row, the column. The name is the model’s documentation, and it is also the file name later.
Step 3: the same design, three sizes
This is the payoff from 5.1 From a List of Dimensions to Objects and 5.4 Building a Modular Set: the loop walks the settings list and builds one pyramid per row. A cursor x carries the position, so a medium pyramid always lands exactly one gap after the small one, whatever the sizes are. Add a fourth row to the settings and a fourth pyramid appears.
three pyramids from one loop
x = 0.0
for name, levels, size_mm, gap_mm in SETTINGS["pyramids"]:
    size = size_mm * MM
    gap = gap_mm * MM
    base = levels * size + (levels - 1) * gap       # footprint of the whole pyramid

    col = bpy.data.collections.new(name)
    bpy.context.scene.collection.children.link(col)

    for level in range(levels):
        make_level(col, levels - level, size, gap, level, x + base / 2)

    x += base + SETTINGS["spacing"] * MM
Step 4: a collection per pyramid, a collection per level
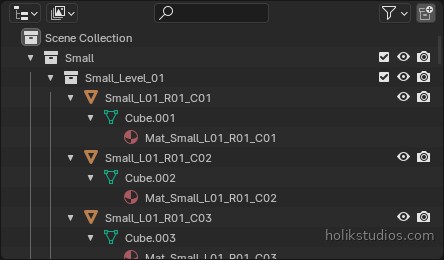
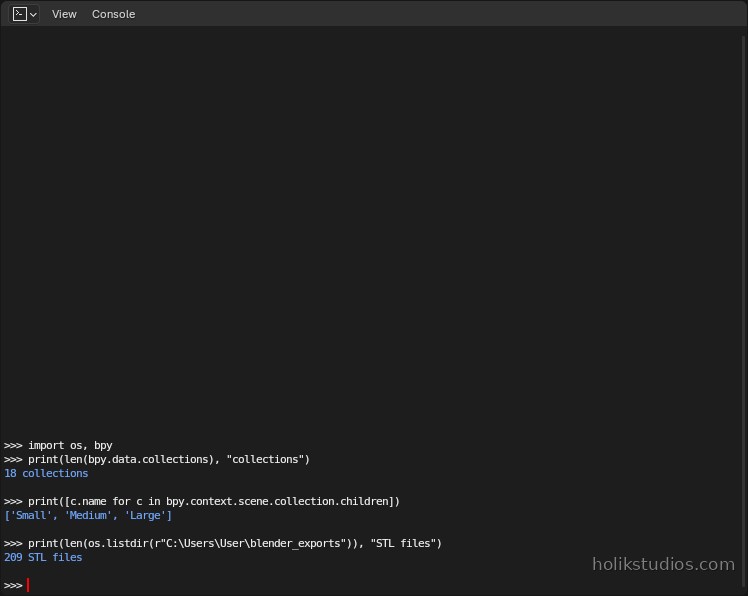
The scene now holds 209 objects, and the Outliner still reads like a table of contents: Small, Medium, Large at the top, and inside each one a collection per level, Small_Level_01 upwards. That is 18 collections in total. Because every block was filed into its collection while it was created, not renamed and sorted afterwards, hiding or showing a whole pyramid is one click. The same trick kept the boolean cutters out of the way in 5.2 Cutting Holes with Booleans.
Step 5: colour from data
Every level takes its colour from one palette list, indexed by the level number (5.3 Batch Rename, Move and Apply). That is why the small pyramid and the large pyramid share their colour bands: they are not decorations, they are a colour per level, and any pyramid with more than seven levels simply cycles back to the start.
Step 6: export everything, named
The last step turns the scene into a delivery: one STL per block, the file name taken from the object name, the folder cleared first so a rerun cannot leave stale parts behind. The scale is set on export, because STL carries no units and slicers read millimetres (5.5 Exporting Many Files in One Run).
export, the last lines of the block
    parts = [o for o in bpy.data.objects if o.type == "MESH"]
    written = sum(export_one(p, folder) for p in parts)
    print("exported %d files, %.1f kB" % (len(parts), written / 1024.0))
209 files, in a couple of seconds, each one telling the workshop exactly where it belongs without opening Blender.
Step 7: the build reports on itself
The script prints its own dimensions and counts, so a wrong build is visible in the log before anyone opens the file. That habit, started in 5.1 From a List of Dimensions to Objects and turned into a settings block in 6.1 A Scene You Configure, Not Edit, is the cheapest quality check in the whole course.
report
for name, levels, base in report:
    print("  %-7s %2d levels, base %5.0f mm" % (name, levels, base / MM))
print("pyramids: %d | blocks: %d | collections: %d | total width: %d mm"
      % (len(report), len(bpy.data.objects), len(bpy.data.collections), round(total / MM)))
The whole script
Here it is end to end. It is about ninety lines, it contains no magic, and every block of it was one lesson earlier in the course.
course_recap.py
# Course recap: three parameterised pyramids, built, structured, measured and exported
import bpy
import os

# 1. settings: the only block you touch (lesson 6.1)
SETTINGS = {
    "pyramids": [("Small", 3, 120, 15),     # name, blocks per side at the base, block mm, gap mm
                 ("Medium", 5, 100, 15),
                 ("Large", 7, 80, 15)],
    "spacing": 90,                          # mm between two pyramids
    "export": True,                         # one STL per part (lesson 5.5)
    "export_dir": r"C:\Users\User\blender_exports",
}
MM = 0.001                                  # settings are millimetres, the scene is metres
MM_SCALE = 1000.0                           # STL carries no units, so export in millimetres
LEVEL_COLOURS = (
    (0.35, 0.75, 0.95), (0.35, 0.90, 0.55), (0.95, 0.85, 0.35), (0.95, 0.55, 0.30),
    (0.90, 0.35, 0.40), (0.70, 0.45, 0.90), (0.45, 0.80, 0.85),
)

# 2. clean slate, objects and collections (lesson 2.4)
for col in list(bpy.data.collections):
    bpy.data.collections.remove(col)
for obj in list(bpy.data.objects):
    bpy.data.objects.remove(obj, do_unlink=True)


def to_collection(obj, col):
    """Take an object out of whatever collection it landed in and put it in ours (lesson 6.2)."""
    for other in list(obj.users_collection):
        other.objects.unlink(obj)
    col.objects.link(obj)


def add_block(name, size, loc, rgb, col):
    """One block: a named, sized, coloured cube filed straight into its collection (3.1-3.2)."""
    bpy.ops.mesh.primitive_cube_add(size=size, location=loc)

    block = bpy.context.view_layer.objects.active
    block.name = name
    block.color = (rgb[0], rgb[1], rgb[2], 1.0)

    material = bpy.data.materials.new("Mat_%s" % name)
    material.diffuse_color = (rgb[0], rgb[1], rgb[2], 1.0)
    block.data.materials.append(material)

    to_collection(block, col)
    return block


def make_level(parent, side, size, gap, level, cx):
    """One level of one pyramid: a square plate of blocks in its own collection (4.1, 4.3, 6.2)."""
    col = bpy.data.collections.new("%s_Level_%02d" % (parent.name, level + 1))
    parent.children.link(col)

    width = side * size + (side - 1) * gap      # real width of this level (lesson 5.1)
    z = size / 2 + level * size                 # it sits on the level below
    rgb = LEVEL_COLOURS[level % len(LEVEL_COLOURS)]

    for row in range(side):
        for ci in range(side):
            x = cx - width / 2 + size / 2 + ci * (size + gap)
            y = -width / 2 + size / 2 + row * (size + gap)

            add_block("%s_L%02d_R%02d_C%02d" % (parent.name, level + 1, row + 1, ci + 1),
                      size, (x, y, z), rgb, col)


# 3. three pyramids from the same function, laid out side by side (lesson 5.4)
x = 0.0
report = []
for name, levels, size_mm, gap_mm in SETTINGS["pyramids"]:
    size = size_mm * MM
    gap = gap_mm * MM
    base = levels * size + (levels - 1) * gap       # footprint of the whole pyramid

    col = bpy.data.collections.new(name)
    bpy.context.scene.collection.children.link(col)

    for level in range(levels):
        make_level(col, levels - level, size, gap, level, x + base / 2)

    report.append((name, levels, base))
    x += base + SETTINGS["spacing"] * MM

total = x - SETTINGS["spacing"] * MM


# 4. export: one file per block, named after the object (lesson 5.5)
def export_one(obj, folder):
    win = bpy.context.window_manager.windows[0]
    area = next((a for a in win.screen.areas if a.type == "VIEW_3D"), None)

    with bpy.context.temp_override(window=win, screen=win.screen,
                                   area=area, region=area.regions[-1] if area else None):
        bpy.ops.object.select_all(action="DESELECT")
        obj.select_set(True)
        bpy.context.view_layer.objects.active = obj

        path = os.path.join(folder, obj.name + ".stl")
        bpy.ops.export_mesh.stl(filepath=path, use_selection=True, global_scale=MM_SCALE)

    return os.path.getsize(path)


if SETTINGS["export"]:
    folder = SETTINGS["export_dir"]
    os.makedirs(folder, exist_ok=True)
    for name in os.listdir(folder):
        if name.lower().endswith(".stl"):
            os.remove(os.path.join(folder, name))

    parts = [o for o in bpy.data.objects if o.type == "MESH"]
    written = sum(export_one(p, folder) for p in parts)
    print("exported %d files, %.1f kB" % (len(parts), written / 1024.0))

# 5. report: the build states its own numbers (lessons 5.1, 6.1)
for name, levels, base in report:
    print("  %-7s %2d levels, base %5.0f mm" % (name, levels, base / MM))
print("pyramids: %d | blocks: %d | collections: %d | total width: %d mm"
      % (len(report), len(bpy.data.objects), len(bpy.data.collections), round(total / MM)))
The checklist before you call a build finished
- It is repeatable: run it twice, get the same result, because it clears the scene and the export folder first.
- It is named: no
Cube.001anywhere, and every file name says what the part is. - It is structured: collections for the units you want to hide, show or export.
- It is measured: the script prints the counts and the key dimensions.
- It is correctly scaled: exports in millimetres, checked once against a known part.
- It is configurable: the numbers live in one block, not scattered through the code.
- It is readable: functions with names instead of forty lines in a row.
Where to go next
- More modifiers from scripts: bevel, solidify, array, mirror. Same pattern as the boolean: add, configure, apply.
- Text and curves: extruded text and profiles make signage and product marking batch work.
- Animation:
keyframe_insert()turns the same loops into moving scenes. - Data from outside: read names, sizes and quantities from a CSV and let the client’s order file be the input.
- Headless runs:
blender --background --python script.pyruns all of this with no interface, which is how a nightly build or a web service makes parts. - Version control: these scripts are text, so they belong in Git, with a comment at the top of each file saying what it builds.
That is the course. You started by opening the Scripting workspace and moving one cube. You end by describing a product family in a settings block and getting a measured, named, structured, exported set out of it. The Blender API is large, but the seven things that did all the work here are objects, dimensions, locations, names, collections, modifiers and an export. Everything else is a variation on those.